Notifications
WHMCS integrates with popular team communication apps, including Slack® and HipChat™, to allow WHMCS to notify you in real time as events occur.
You can access this feature at Configuration () > System Settings > Notifications.
Using conditions, you can set up WHMCS to notify you in your Slack channels and HipChat rooms about the events that are important to you. For example:
- Notify my Support channel or room when a new ticket opens in the Support department with a High priority.
- Notify my Enterprise Support channel or room when a new ticket opens or a customer in the Enterprise Customers client group replies.
- Notify my Emergency channel or room when a new ticket opens containing the word
Emergencyin the subject. - Notify my Sales channel or room when someone places a new order with a value over $25.
- Notify my Billing channel or room when a customer in the High Value client group pays an invoice.
- Notify my Customer Service channel or room when a customer places an order for a Business Hosting product.
Configuring Notification Providers
WHMCS supports the following notification providers:
You can add your own notification providers by creating a custom notification module.
- The Email module that ships with WHMCS is not encoded. You can copy it to use as a template for custom notification module development.
- For more information, see our Developer Documentation.
Creating a Notification Rule
Notifications use rules. Each rule defines when to trigger a notification through a combination of events and conditions.
To create a new rule:
- Click Create New Notification Rule.
- Enter a name and description for your rule to allow you to easily identify it again later.
- Choose an event category.
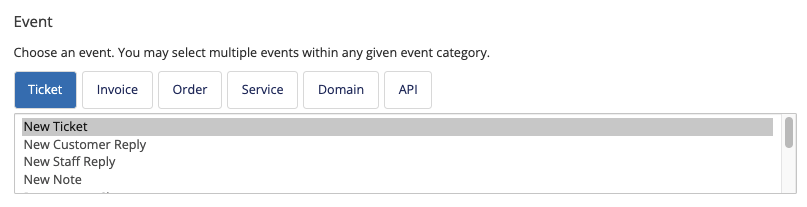
- Choose one or more events to trigger the notification within the selected event category.
Ctrl+Clickto select multiple events.You can add custom events using the WHMCS API. For more information, see Custom Notification Events. - Configure any conditions you want to use to restrict when the system triggers the notification. The available conditions depend on the selected event category.
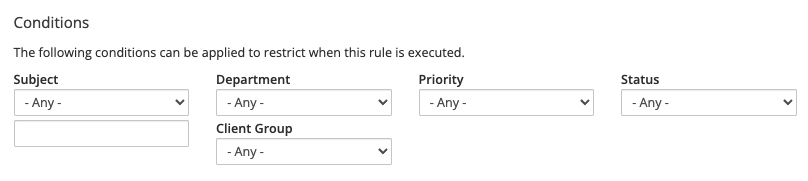
- By default, all conditions default to unrestricted.
- To apply a condition, select or provide a value for a given condition.
- For free text-based conditions like Subject, you can choose from an exact match or a containing match.
- For monetary value conditions like Order Total, you can specify a Greater Than or Less Than match.
- You can create custom conditional logic using the
NotificationPreSendhook point.For more information, see Advanced Notification Logic.
- Configure the notification provider.

For more information, see:
- Configure the notification settings.
- The available notification settings will depend on the provider that you selected. For example, for HipChat and Slack, you must select a room or channel, and then can set the desired message.
- HipChat also allows you to set whether the notification triggers an alert like a sound or mobile notification.
- Click Create.
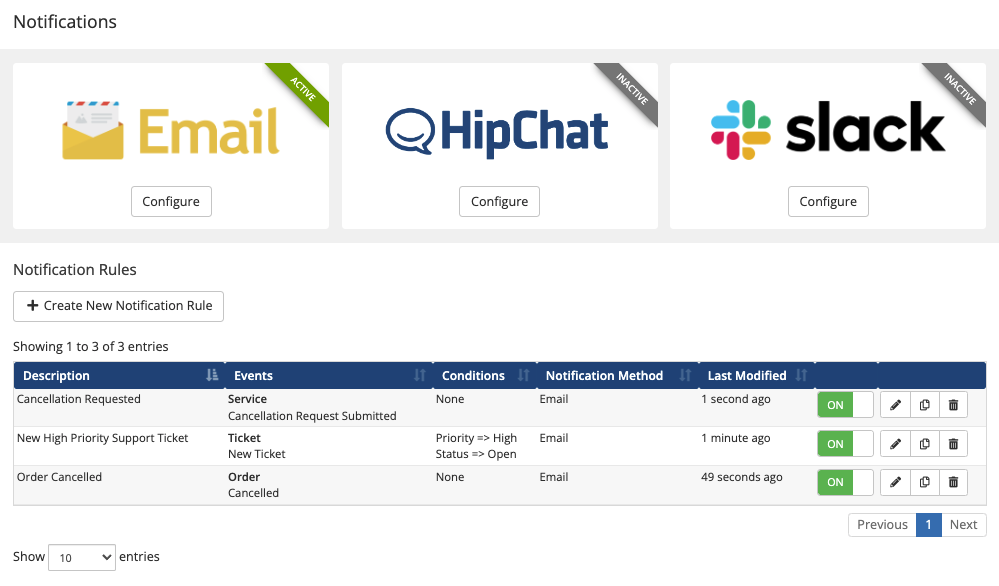
Notification Rules
The list of notification rules includes all of the rules on your WHMCS installation.
Enabling and Disabling Notifications
To enable a notification rule, set the toggle to ON, or set the toggle to OFF to disable it.
Edit a Notification Rule
To edit a notification rule, click the pencil icon for that notification rule.
Duplicate a Notification Rule
To duplicate a notification rule, click the copy icon. Customize the configuration that displays and then click Duplicate.
Delete a Notification Rule
To delete a notification rule, click the trash can icon and then confirm the deletion.
Customization Options for Self-Hosted WHMCS Installations
If you use a self-hosted WHMCS installation, you can further customize notifications using advanced notification logic or by creating custom events.
Advanced Notification Logic
You can customize notification conditions further on self-hosted WHMCS installations using the NotificationPreSend hook point. The NotificationPreSend hook point executes prior to the system sending a notification. This allows you to apply additional conditional criteria and manipulate the notification message.
You can also use this hook point to prevent sending a notification that uses your logic.
For example, the following hook code would prevent WHMCS from sending notifications for invoices with an invoice ID that is greater than 1000:
<?php

add_hook('NotificationPreSend', 1, function($vars) {

    $eventType = $vars['eventType']; // e.g. "Ticket", "Invoice", "Order", "Service" or "Domain"
    $eventName = $vars['eventName'];
    $rule = $vars['rule'];
    $hookParameters = $vars['hookParameters'];
    $notification = $vars['notification'];

    // Perform additional conditional logic and throw the AbortNotification
    // exception to prevent the notification from sending.
    if ($eventType == 'Invoice'
        && $eventName == 'created'
        && (isset($hookParameters['invoiceid'])
        && $hookParameters['invoiceid'] > 1000)
    ) {
        throw new \WHMCS\Notification\Exception\AbortNotification();
    }

    // If allowing the notification to continue, you can manipulate the
    // notification using the \WHMCS\Notification\Notification object.
    $notification->setTitle('Override notification title');
    $notification->setMessage('Override notification message body');

});
To prevent the notification, the system returns a \WHMCS\Notification\Exception\AbortNotification(); exception.
If the ID is below 1000, the system will continue to send the notification, but will override the title and message.
To override values, use the set functions in $notification.
Custom Notification Events
You can use the TriggerNotificationEvent WHMCS API function to create custom notification events for self-hosted WHMCS installations. This allows you to augment the already-available list of events that you can choose when setting up a notification rule at Configuration () > System Settings > Notifications.
Creating a Custom Event
To create a custom event, call the TriggerNotificationEvent API function in your custom code.
For example, the following code creates an event that uses the AdminLogin hook to trigger a notification whenever an admin logs in to the Admin Area:
<?php
add_hook('AdminLogin', 1, function($vars) {
    $command = 'TriggerNotificationEvent';
    $postData = array(
        'notification_identifier' => 'adminarea.staff.login', // A unique identifier used when referencing the notification rule.
        'title' => 'A Staff Member Just Logged In',
        'message' => $vars['username'] . ' just logged in to the WHMCS Admin Area.',
        'url' => 'https://whmcs.example.test/admin/',
        'status' => 'Success',
        'statusStyle' => 'info',
    );
    $adminUsername = 'ADMIN_USERNAME'; // Optional
    $results = localAPI($command, $postData, $adminUsername);
    print_r($results);
});
Make certain that you include a unique notification_identifier value. You will use this identifier when you configure notification rules for this event.
Using Custom Events
After you create your custom code, you must still create a notification rule using the event.
To do this:
- Go to Configuration () > System Settings > Notifications.
- Click Create New Notification Rule.
- Enter a name and description for your rule to allow you to easily identify it again later.
- Select API as the event category.
- Select Custom API Trigger as the event.
- For Trigger Identifier, enter the notification identifier that you specified in your custom code. In the example above, this is
adminarea.staff.login. - Select Exact Match.
- Configure the notification provider.
For more information, see:
- Configure the notification settings.For more information, see Notifications.
- Click Create.
Whenever you trigger the API call in your custom code, the system will send the configured notification.
Last modified: 2026 March 4