Servers
In WHMCS, server modules allow you to quickly enable and configure automation on many popular server control panels. You can add each of your servers in order to assign sales to them and perform other important tasks.
You can access this feature at Configuration () > System Settings > Servers.
Server Groups
Server groups allow you to configure servers into sets in which you can assign products automatically, based on your requirements and provisioning settings.
Create a Server
To add a new server to your WHMCS installation:
- Click Add New Server.
- Select a server module. WHMCS ships with the following server modules by default:
- Provide the displayed information.
- Click Save Changes, or click Go to Advanced Mode to configure advanced options.
- For steps to add servers, see Create a Server.
- For specific steps for the most popular server modules, see:
Server Settings
For each server, you can configure the following settings:
| Setting | Description |
|---|---|
| Name | Enter a unique name to identify this server. |
| Hostname | Enter the primary domain of the server. The system uses this to link to the server with certain modules. |
| IP Address | Enter the primary IP address of the server. The system uses this to connect to the server. |
| Assigned IP Addresses | Enter the other IP addresses for the server here. The system uses them in conjunction with Utilities > Domain Resolver to check which domains in WHMCS are pointing to your server. |
| Monthly Cost | Optionally, enter the monthly server cost. The system uses this in reports to calculate profit. |
| Datacenter/NOC | Optionally, enter the data center for the server. The system only uses this to help you keep records of server locations. |
| Maximum No. of Accounts | Enter the maximum number of accounts to add to the server. The system uses this to find the server’s use percentage and determine when the default server is full. After the selected server is full, the system updates the default to provision accounts on the next server with available space. |
| Server Status Address | The URL to use for status monitoring. For more information, see Status Monitoring. |
| Enable/Disable | Check to disable the server. For more information, see Enable and Disable Servers. |
| Nameservers | Enter the nameservers for this server (for example, ns1.example.com and ns2.example.com). The system uses them in the welcome emails and when registering domains. You can specify up to five nameservers and IP addresses. |
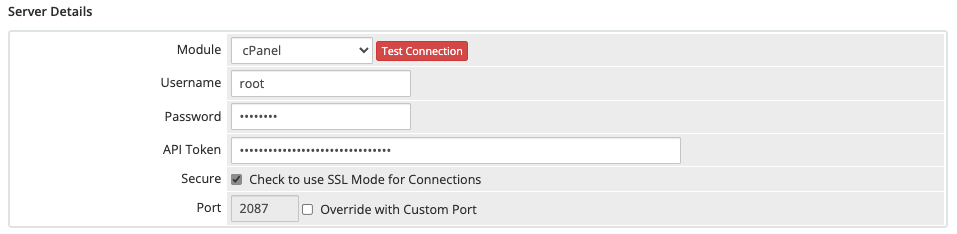
| Type | The server module. |
| Username | The username for your root or reseller account on the server. |
| Password | The password for your root or reseller account on the server. |
| API Token | The API token that you created in WHM. For more information, see Manage API Tokens in WHM. |
| Access Hash | The access hash for your root or reseller account. Some hosting control panels require an access hash or allow you to use an access hash instead of a password. |
| Secure | Check to enable SSL for server connections. |
| Port | The port to use for connections to the server. Check Override with Custom Port to enter a custom port number. If you do not see Port, your server module does not support port customization. For more information, see Override with Custom Port. |
Status Monitoring
Status monitoring allows you to view the load and uptime for each of your Linux®-based servers from within the WHMCS Client Area or Admin Area.
To use this feature, upload the status folder in the WHMCS ZIP file download to each of your servers. Then, enter the URL to that folder for Server Status Address. You can also leave the setting blank, which disables monitoring for that server.
WHMCS disables PHP Info output by default for security reasons. To enable it, edit the index.php file and remove the # character from (uncomment) the following line:
#phpinfo();
If you use WHMCS Cloud, you can download a copy of this file.
Enable and Disable Servers
You can enable and disable servers. This allows you to retain server information while ensuring you do not experience issues due to intentionally-disconnected servers. The status of each server displays in the Status column in the list of servers.
- Enabled servers display a green checkmark icon.
- Disabled servers display a grey X icon.
Disabling a server removes it from the daily usage statistics update (which could fail if a disconnected server is enabled in WHMCS) and moves it to the bottom of all server menus.
To change the status of a server from within the list of servers, click the status icon to toggle to the other status. For example, click the green checkmark icon on an active server to deactivate it.
Override with Custom Port
Many server modules allow you to customize the port number for connections via the server configuration. If a module supports this, Port will display in the server configuration.
Check Override with Custom Port for the existing port number and then customize the port value. Unchecking Override with Custom Port will reset the value to the default for the server:
| Module Name | Standard Port | SSL Port |
|---|---|---|
| cPanel | 2086 | 2087 |
| DirectAdmin | 2222 | 2222 |
| Helm 4 | 8086 | - |
| HyperVM | 8888 | 8887 |
| Interworx | - | 2443 |
| LXAdmin | 7778 | 7777 |
| SCPanel | 2086 | 2087 |
| WHMSonic | 2086 | 2087 |
8443), enter the port number in Access Hash instead of Port.Default Server
If a server is the only server for the selected module, click on the name in the server list after you save the server details. Check whether an asterisk (*) appears next to it. This ensures that it is the default.
The system will use the default when any other non-specific configuration (like a server group) doesn’t apply.
Login to Control Panel
Some server modules support logging in to the control panel directly from WHMCS. To do this, click Login to Control Panel for that server.
Sync Accounts
The Sync Accounts feature can help you resolve issues in which the accounts in WHMCS do not match the accounts on your hosting server. To perform a sync, click Sync Accounts and follow the displayed instructions.
Delete a Server
To delete a server, click the red X icon for that server. If the deletion succeeds, a confirmation message will appear. Click OK.
Delete a Server or Provisioning Module
To completely remove a server or provisioning module:
- Ensure that no products or services in WHMCS use that module.
- Delete any associated servers.
- Delete the module files from the
/modules/serversdirectory.
- If you use a self-hosted WHMCS installation, we strongly recommend that you perform a full database and filesystem backup before deleting modules from your WHMCS installation.
- If you are using a custom or third-party module, check with the module’s developers for any additional steps to perform before deletion.
Last modified: 2026 April 30