Users and Client Accounts
The user management system allows a single user to access multiple client accounts in order to separate authentication and authorization from services, billing, and support. It also allows customers to manage their accounts and grant access to it to other users.
Users and Accounts
The user management system includes two different entities: users and accounts.
- Accounts (or client accounts) own products and services. They represent a billable party, like a business, and associated users can access and manage them.
- Users can access and manage one or more of their associated accounts. Separate controls manage user access to each account.
When a new customer or an admin creates a new account, this also creates a new user based on the account profile. This becomes the account owner, with each account only having a single account owner.
- Account owners have all of the possible permissions that a user can possess.
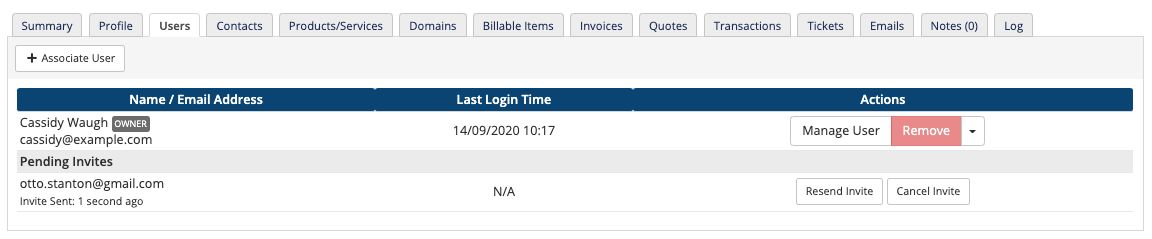
- Account owners can manage users and their permissions from the User Management section of the Client Area and are the only users who can send invitations from the account to new or existing users.
For example, each of a web designer’s customers could represent a distinct account. The web designer could log in as a user and access each of these accounts using a single set of credentials. However, the accounts themselves would not be connected.
- For steps to create client accounts, see Add a Client.
- For steps to create users, see Add and Associate Users.
- For steps to match a user’s details to the details for a client account, see Match User and Client Details.
- For information about client statuses, see Profile Tab.
Invitations
When you associate a user with a client account, you can send an invitation to a specified email address. The invitee will receive an email and must click the included link, or you can choose to not send an invitation and add the user directly to the account.
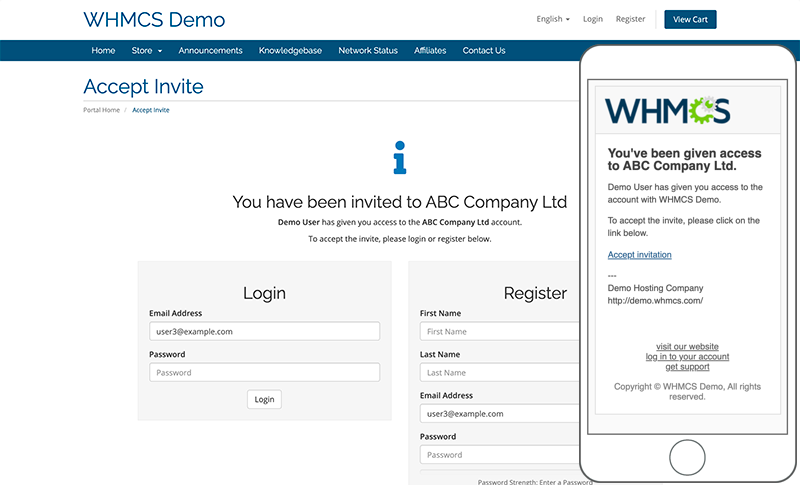
The invitation contains a one-time link that is valid for seven days. The user must click the link and complete the process to accept the invitation.
- If you send an invitation to an email address for an existing account, the recipient can log in as their existing user to accept the invitation or create a new user with any email address that they choose.Accepting an invitation is not the same as client email verification.
- If the email address does not correspond to an existing account, they can create one.
While invitations go to the specified email address, the recipient can complete the invitation process using this link with any email address they choose. Because of this, accepting an invitation is not equivalent to user email verification, which is a separate feature.
In the Client Area
Account owners can send invitations from the User Management section of the Client Area. We recommend this method for inviting users to existing accounts.

In the Admin Area
Admins can send invitations from the Users tab of the client profile in the Admin Area.
Logging In
When a user who is only associated with one account logs in, their login session will automatically be associated with that account.
When a user with more than one account logs in, the Choose Account page will appear. The user must select an account so that only information relevant to that account displays.
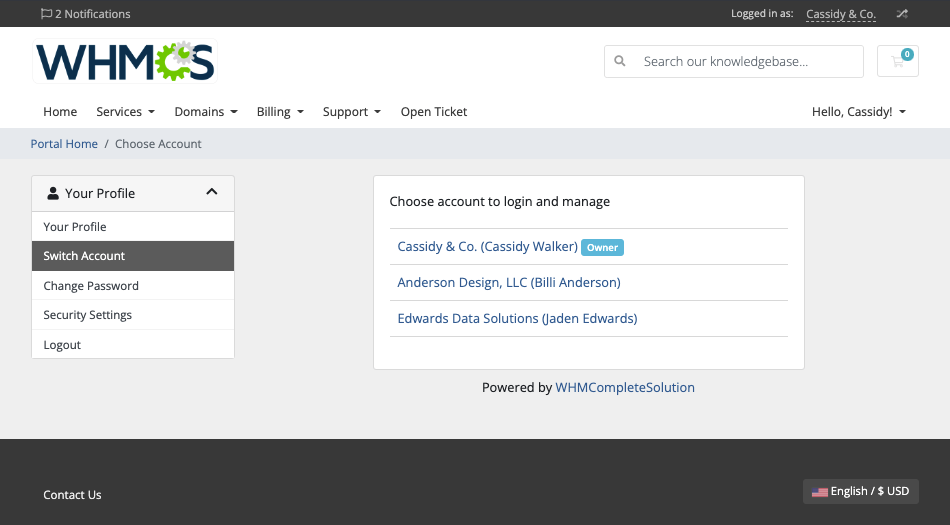
Click on the desired account name to log in to that account. You can change your account at any time by going to Hello, Name!, clicking Switch Account, and clicking an account name again.
Client Area Management
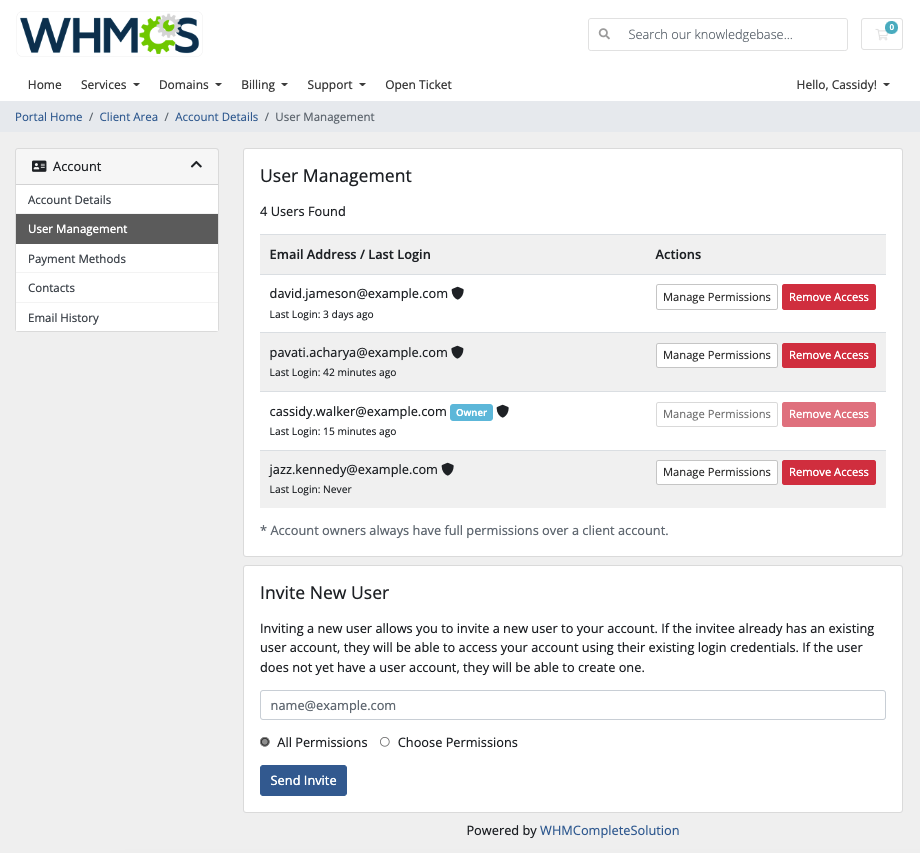
Account owners can manage users and their permissions from the User Management section of the Client Area. We recommend this method for inviting users to existing accounts.
To invite a user:
- Go to Hello, Name! > User Management.
- Find the desired user in the list.
- Click Manage Permissions.
- Select the desired permissions.
- Click Save Changes.
- Account owners cannot edit their own permissions.
- Disable Client Area User Management in Configuration () > System Settings > General Settings in the Other tab can disable user management for account owners and prevent them from inviting new users.
Admin Area Management
Admins can view information about and manage individual accounts and their associated users, including resetting passwords, in the Users tab of an account’s client profile.
Deleting Users
You can delete users in the WHMCS Admin Area through several methods:
Delete Only One User
Go to Clients > Manage Users and click Manage User for the desired user. Then, click Permanently Delete.
Delete a Client and Associated Users
Toggle Delete users who are only associated with this client to YES when you delete a client from the Summary tab of the client profile.
Automatically Delete Inactive Users
If you use the Data Retention Pruning setting to delete clients after closure or a period of inactivity, you can also choose to automatically delete the account’s associated users.
To do this:
- Go to Configuration () > System Settings > Automation Settings.
- Go to Automatically Delete Inactive Clients.
- Set the toggle to YES.
In Support Tickets
If they have the View & Open Support Tickets permission, all of the users for an account can view and reply to the account’s support tickets.
In the Admin Area, each reply on a ticket includes a badge based on the correspondent’s email address, the associated account for the ticket, and the WHMCS system. For example, these badges include Owner for the account owner, Operator, Authorized User, Registered User, and Guest.
- Sub-account appears when a reply is received from an address that’s in the account’s list of contacts.
- For an explanation of each badge’s meaning, see Support Tickets.
In the Activity Log
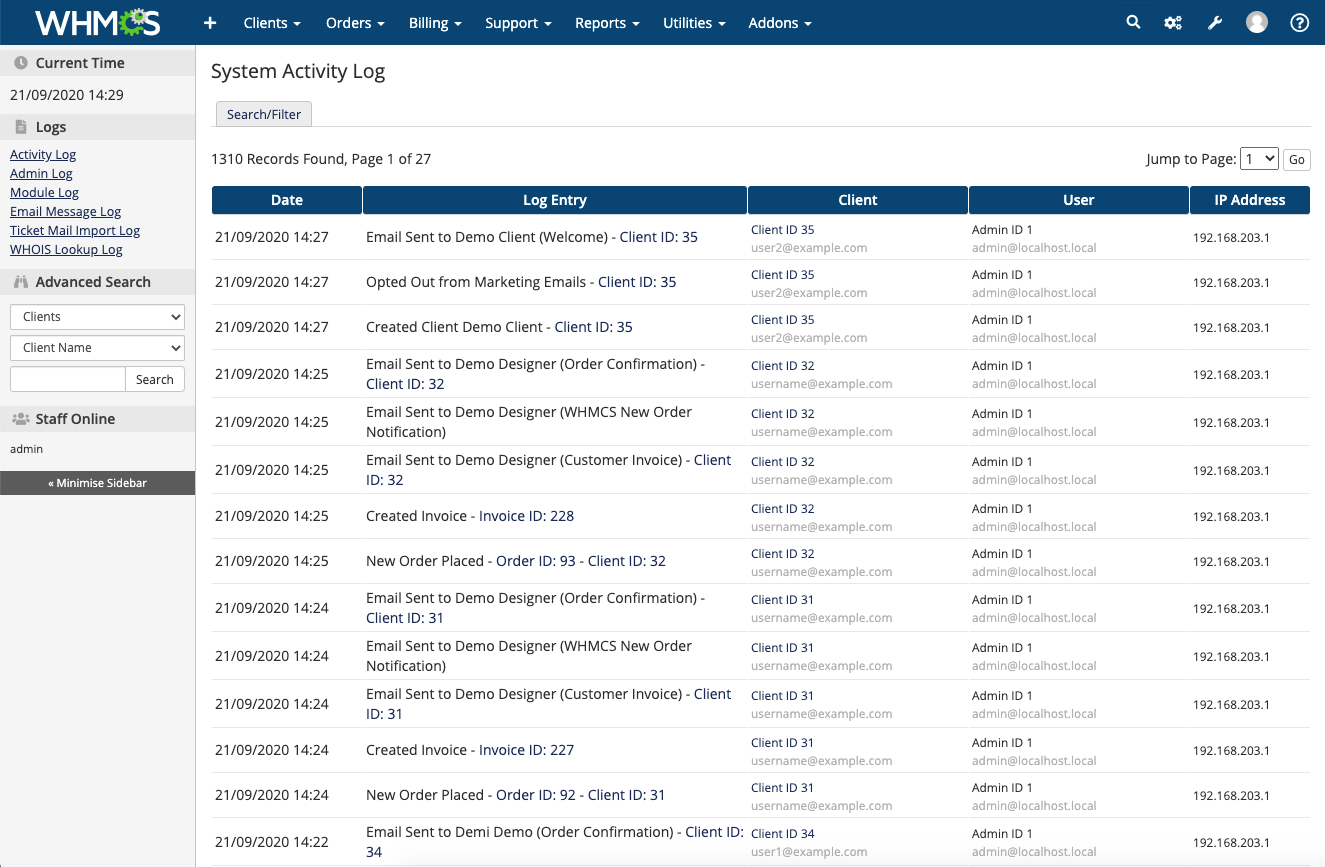
The Activity Log at Configuration () > System Logs in the Admin Area lists information about events in WHMCS, attributing each event to its associated entity.
- Automation events are attributed to System.
- Admin actions that operate on the system are attributed to that admin. All other admin actions are attributed to that admin and list the associated client account.
- The system attributes user actions to the user that performed the action. User actions list information about the user and the associated client account that the user performed the action on.
In Orders
Each order is associated with a specific user account.
- If the user placed the order through the Client Area, it is associated with the logged-in user that placed the order.
- If an admin creates the order through the Admin Area, the account owner’s user is associated with the order.
This determines which user requires verification if you use User Identity Verification.
Last modified: 2025 July 28