cPanel Licensing
The cPanel Licensing module uses cPanel’s Manage2 API to provide an automated solution for cPanel Partners to provision, manage, and bill for cPanel & WHM licenses.
- WHMCS does not include this addon module by default.
- Make certain that you are using the correct addon module:
- The cPanel Licensing addon automates purchases of cPanel & WHM licenses through Manage2.
- The Software Licensing addon module allows you to generate and check licenses for software products that you develop.
- To use this module, you must be a cPanel Partner.
- For more information and current release data, see cPanel Licensing on the WHMCS Marketplace.
Activation
You will need to download and upload the module before you can activate the addon through the Admin Area.
- Download the latest version of the addon.
- Extract the ZIP file.
- Upload the
cpanellicensingdirectory to the/modules/addonsfolder of your WHMCS installation. - Go to Configuration () > System Settings > Addon Modules.
- Click Activate for cPanel Licensing.
- Click Configure.
- Select the admin role groups that will have access to this addon.
- Select the admins who can configure settings within the addon.
- Click Save Changes.
Using the cPanel Licensing Module
After configuring the module, you will need to authenticate into Manage2.
To do this, go to Addons > cPanel Licensing and log in using your Manage2 username and password. The system will import your Manage2 data into WHMCS. This may take several minutes depending on the number of licenses in your Manage2 account.
You can view the information that the module imports from Manage2 in the Licenses, Groups, and Packages tabs.
Licenses
In the Licenses tab, you can view and modify the license data in Manage2.
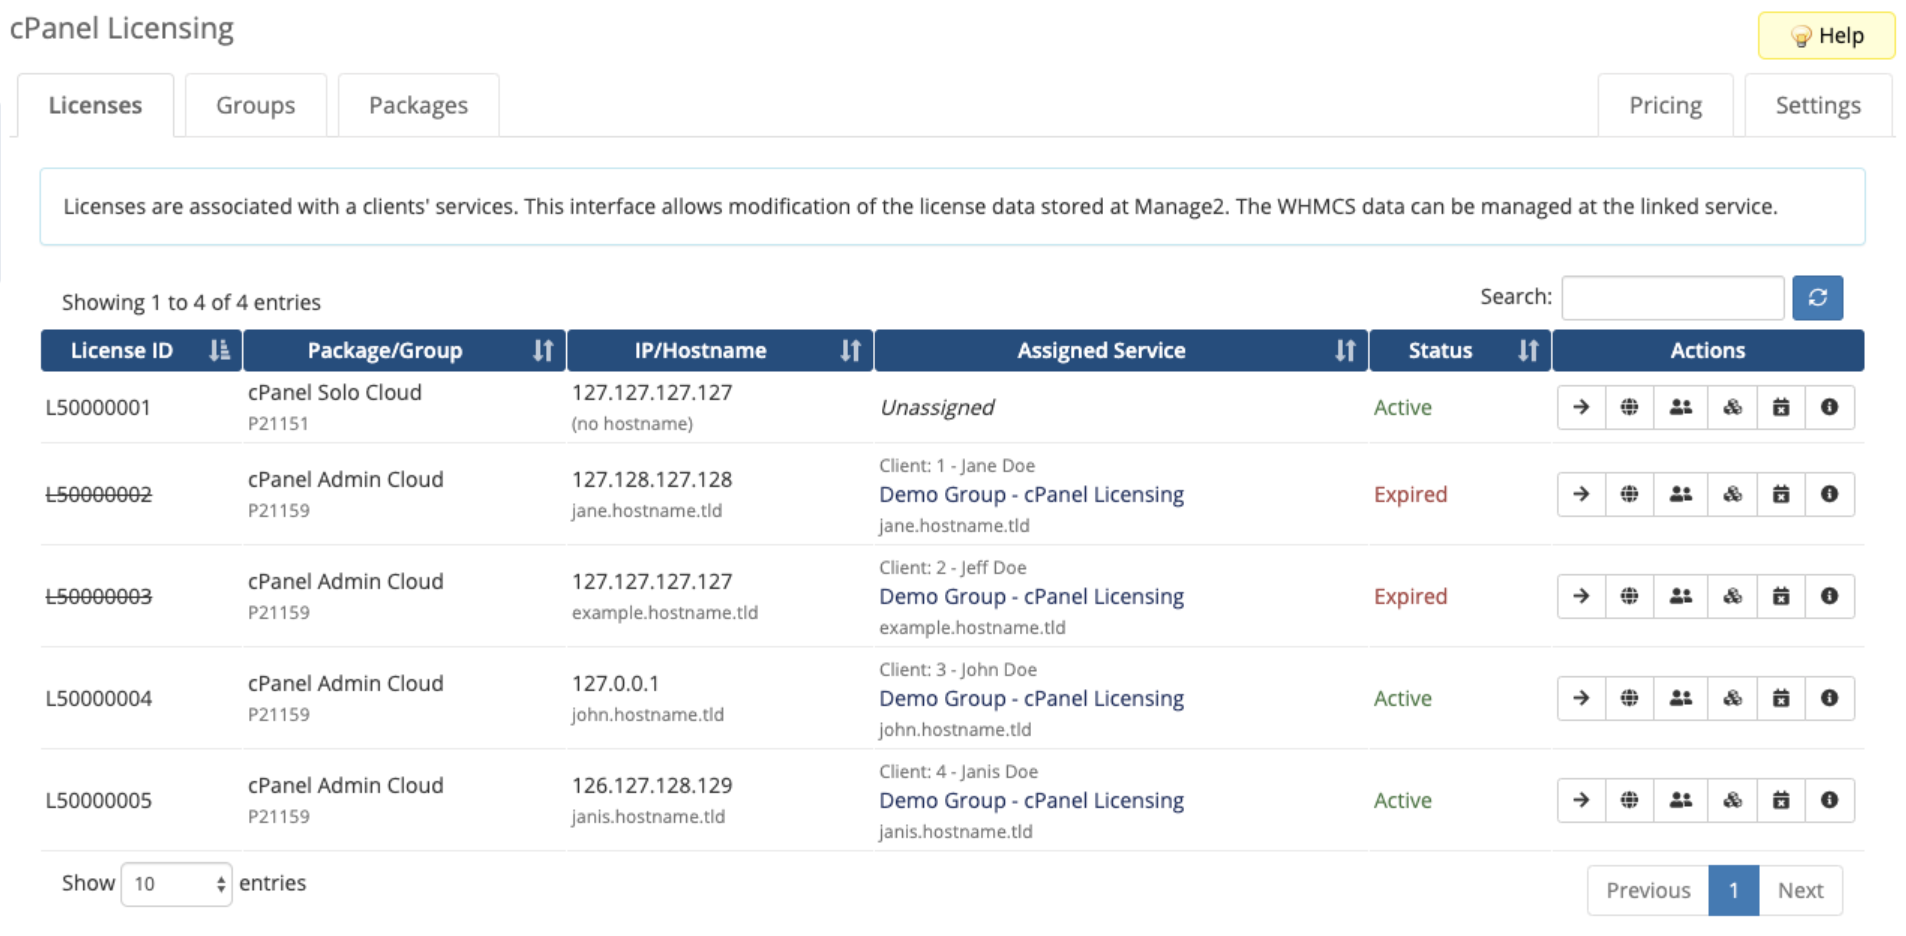
The list of licenses displays the following license information:
- License ID
- Package/Group
- IP/Hostname
- Assigned Service
- Status
You can also perform the following actions for each license:
| Action | Description |
|---|---|
| Assign License | Assign the license to an existing service. For more information, see Assigning Licenses to Services below. |
| Change IP | Change the license’s associated IP address. |
| Change Group | Change the license’s group. |
| Change Package | Change the license’s package. |
| Expire | Expire the license in Manage2. Expiring the license will not stop billing for that license. To stop billing, you must also set the parent service’s configurable option to None and recalculate the Recurring Amount value. |
| View License Details | View additional detailed license information. |
Groups
In the Groups tab, you can view and modify your groups in Manage2. Groups let you organize your licenses in categories.
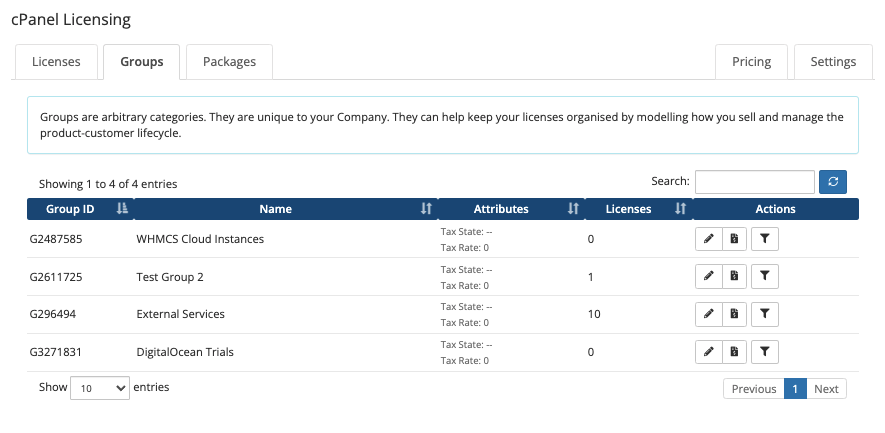
The list of groups displays the following information:
- Group ID
- Name
- Attributes
- Licenses
You can also perform the following actions for each group:
| Action | Description |
|---|---|
| Change Name | Change the group’s name. |
| Change Tax Status | Change the group’s status. |
| Show Licenses | Display the list of licenses for that group. |
Packages
In the Packages tab, you can view and modify your packages in Manage2. Packages represent the products, features, or bundled options for a license.
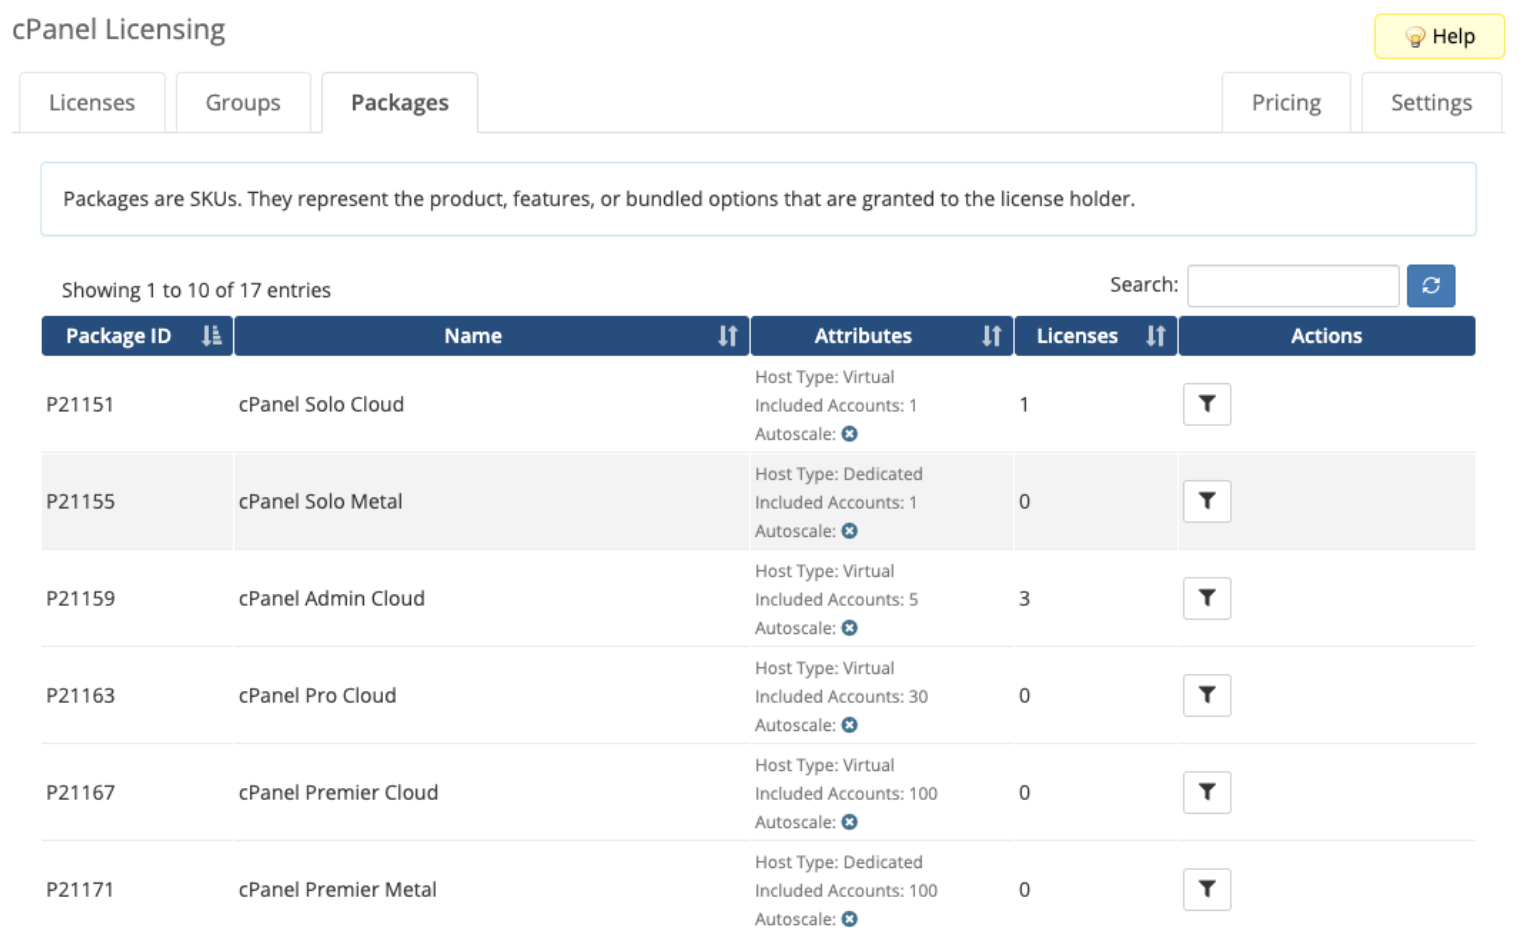
The list of packages displays the following information:
- Package ID
- Name
- Attributes
- Licenses
You can also click Show Licenses in the Actions column to display the list of licenses for that package.
Pricing
In the Pricing tab, you can set pricing for license-related configurable options and metric pricing for cPanel accounts.

Configurable options can be for a product that can use a cPanel license, like a VPS or Dedicated server. You can also sell them as standalone products.
The list of configurable options displays the following information:
- ID
- Configuration Name
- Selections
- Auto-Scale
You can click the wrench icon in the Manage column to manage that option.
Create an Option
You can create options for offering cPanel licenses to your customers.

To create a new option:
- Click New in the top-left corner.
- For Parent Group, select the option group to contain the new option. Choose Create New Group to enter a group name for a new option group.
- For Option Name, enter the configurable option’s display name.
- For Option Type, enter the configurable option’s type. You can choose Dropdown or Radio.
- For Auto-Populate, check to automatically populate the new option with the default cPanel license packages and recommend retail pricing.
- For Hardware Type, select whether to offer licenses for dedicated or VPS servers.
- For Default Visibility, set whether the configurable option is hidden or visible on the order form.
- Click Create.
Import an Existing Option
If you already have configurable options that you want to use, you can import them:
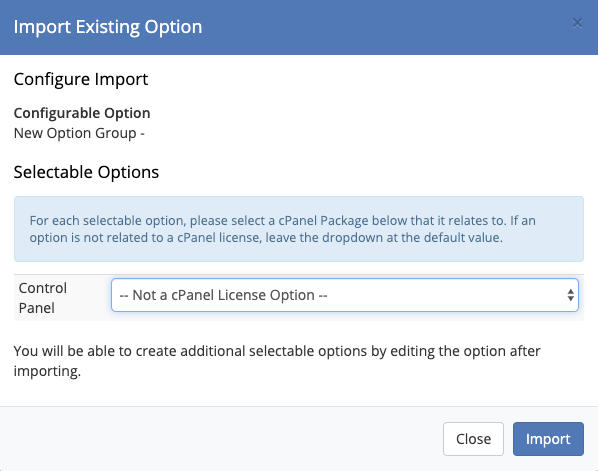
To import existing configurable options to use with cPanel license products:
- Click Import in the top-right corner.
- Choose the desired configurable option group.
- Click Continue. The list of options for that option group will appear.
- For each option under Selectable Options, select the associated cPanel package.
- Select Not a cPanel License Option to skip importing this option.
- You can only import options that use the Dropdown and Radio option types.
- Click Import.
After you finish importing configurable options, you can view and manage them in the Pricing tab’s list of options.
Manage Options
Click Manage to manage a configurable option group, update pricing, and create new options within the group.
A new window will display information about the configurable option group and its settings.
Update the Configurable Option Group
To update settings for the configurable option group:
- Select the desired option type (Dropdown or Radio).
- Toggle Visibility to show or hide the option group on the order form.
- Toggle Autoscale Option to enable or disable autoscaling.
The system will automatically save your changes.
Reorder Options
You can reorder the list of options under Options to change how they display on the order form. To do this, click the arrow icon next to the option name and drag it to the desired position in the list.
The system will automatically save your changes.
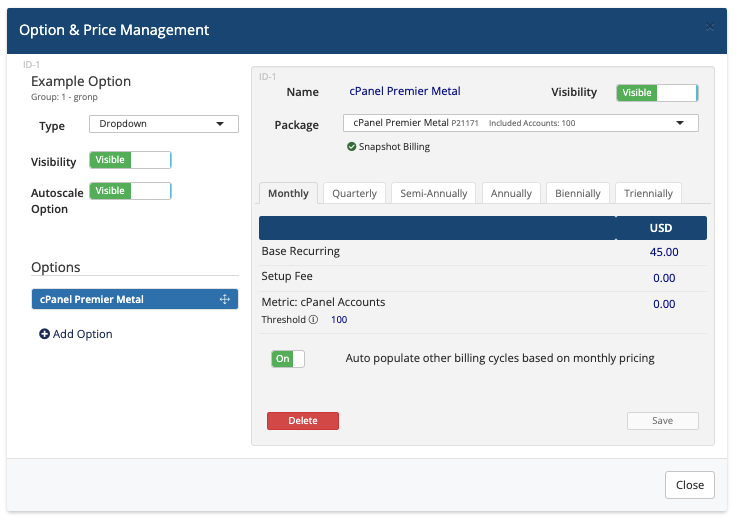
Update an Option
To update settings and pricing for an individual option:
- Click on the desired option under Options.
- To show or hide the option on the order form, toggle Visibility.
- To set the associated cPanel package, choose one for Package.
- To set pricing:
- Click on the desired billing cycle tab.
- Enter the desired Base Recurring and Setup Fee prices.
- For products that include unlimited cPanel accounts:
- For Metric: cPanel Accounts, enter the price for each cPanel account that a customer uses beyond the Threshold setting. For more information, see Per-Account Billing below.
- For Threshold, enter the maximum number of accounts that a customer can have before billing them on a per-account basis.
- If you are updating prices in the Monthly tab, toggle Auto populate other billing cycles based on monthly pricing to automatically populate prices for other billing cycles. If you do this, you will not be able to select the other billing cycle tabs.
- Click Save.
You can also click Delete to delete the option.
Per-Account Billing
The cPanel Licensing addon can bill customers for the number cPanel accounts that they use above a set threshold. This requires a package that includes unlimited cPanel accounts and an option for which you have configured Metric: cPanel Accounts and Threshold.
When a customer places an applicable order, the system takes a snapshot of the current price. This ensures that changes to a package’s metric pricing will not affect existing orders.
- The system stores the snapshot and uses it when generating future renewal invoices for the service.
- To update the pricing snapshot for a service to use the current metric pricing, select Auto Recalculate on Save when you make changes to the product in the Products/Services tab in the client profile. This discards the previous snapshot and create a new one.
The cPanel Licensing addon retrieves the number of cPanel accounts from Manage2 at the time of invoice generation. This ensures the most accurate value relative to Manage2.
Settings
In the Settings tab, you can configure settings for Manage2, autoscaling, and license sales.
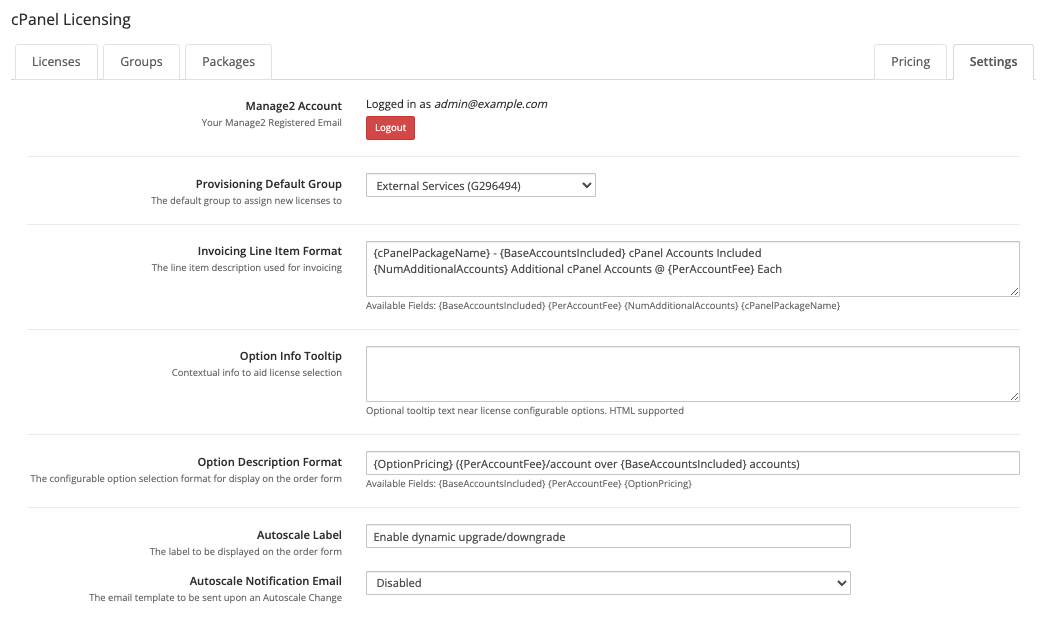
Click the Settings tab to configure the following settings:
| Setting | Description |
|---|---|
| Manage2 Account | The currently-authenticated Manage2 account email address. Click Logout to log out of the account. |
| Provisioning Default Group | Select the default Manage2 group for new licenses. |
| Permissions | Select the access controls for functionality within this addon. |
| Invoicing Line Item Format | Enter the invoice line item description for packages that offer bulk cPanel accounts. |
| Option Info Tooltip | Enter a tooltip to display with the license configurable options during checkout. This setting is optional and supports HTML. |
| Option Description Format | Enter the configurable option selection format to display on the order form for packages that offer bulk cPanel accounts. |
| Autoscale Label | Enter the label display on the order form. |
| Autoscale Notification Email | The email template to send when autoscaling makes a change (see below). |
Autoscaling
Autoscaling allows the cPanel Licensing addon module to dynamically adjust a service’s configurable options using the number of accounts on its cPanel license.
Autoscaling uses the following procedure:
- A server administrator provisions an extra cPanel account, pushing the server to the next cPanel license tier.
- cPanel’s Manage2 software detects this and changes the license tier for billing purposes in the cPanel Partner account.
- WHMCS syncs with Manage2 at specific intervals to detect this change.
- The Control Panel configurable option in WHMCS changes to match the new cPanel license tier. As a result, the service price recalculates to include the additional cost of the new license tier.
- The next renewal invoice that the service generates (per the Next Due Date) will reflect the new cPanel license tier.
Autoscale Notification Email
The cPanel Licensing module can send a custom email notification to a client whenever it makes an autoscaling change.
To configure this:
- Create the custom email template at Configuration () > System Settings > Email Templates.
- The template must use the Product/Service Messages or Notification Messages types.
- The template can use the following merge fields:
newOption— The display name of the configurable option that autoscaling upgraded to.oldOption— The display name of the previous configurable option.isUsageUpgrade— A Boolean value that indicates whether the upgrade is due to usage activity.
- Go to Addons > cPanel Licensing.
- Click on the Settings tab.
- Set Autoscale Notification Email to the new email template.
- Click Save Changes.
Standalone Product
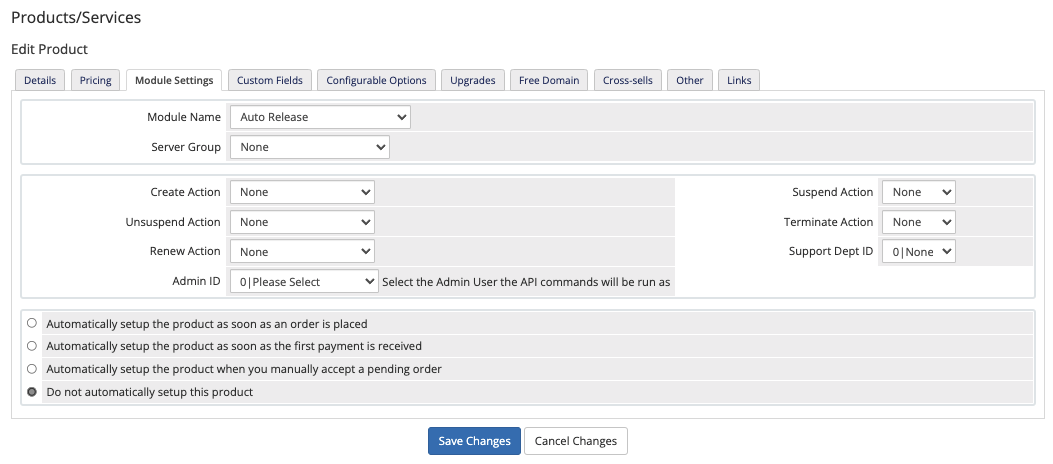
To present a standalone product that provisions a cPanel license, use the cPanel Licensing addon with the Auto Release provisioning module:
- Go to Configuration () > System Settings > Products/Services.
- Click Create a New Product.
- Select Other for Product Type.
- Enter a product name.
- Select Auto Release for Module Name.
- Click Continue.
- Select the Pricing tab.
- Choose Recurring for Payment Type.
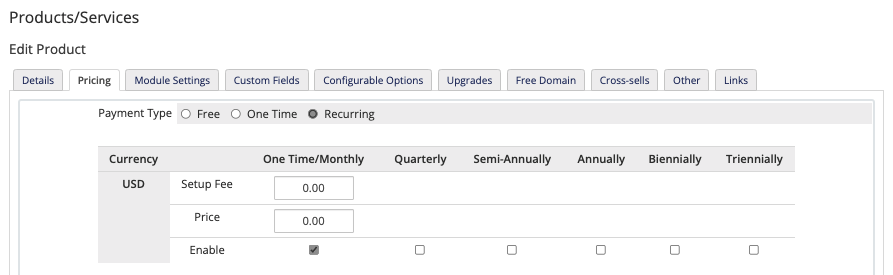
- Check the checkboxes in the One Time/Monthly column.
- Specify Setup and Price values of
0.00. - Select the Module Settings tab.
- Select Automatically setup the product as soon as the first payment is received.
- Select the Configurable Options tab.
- Click the configurable option group for the cPanel license types. The cPanel Licensing addon creates this.
- Configure any other desired options.
- Click Save Changes.
When clients order this product, they will see the cPanel License Tier configurable option at the product configuration stage of the shopping cart. The system will provision the license with payment.
Service Management
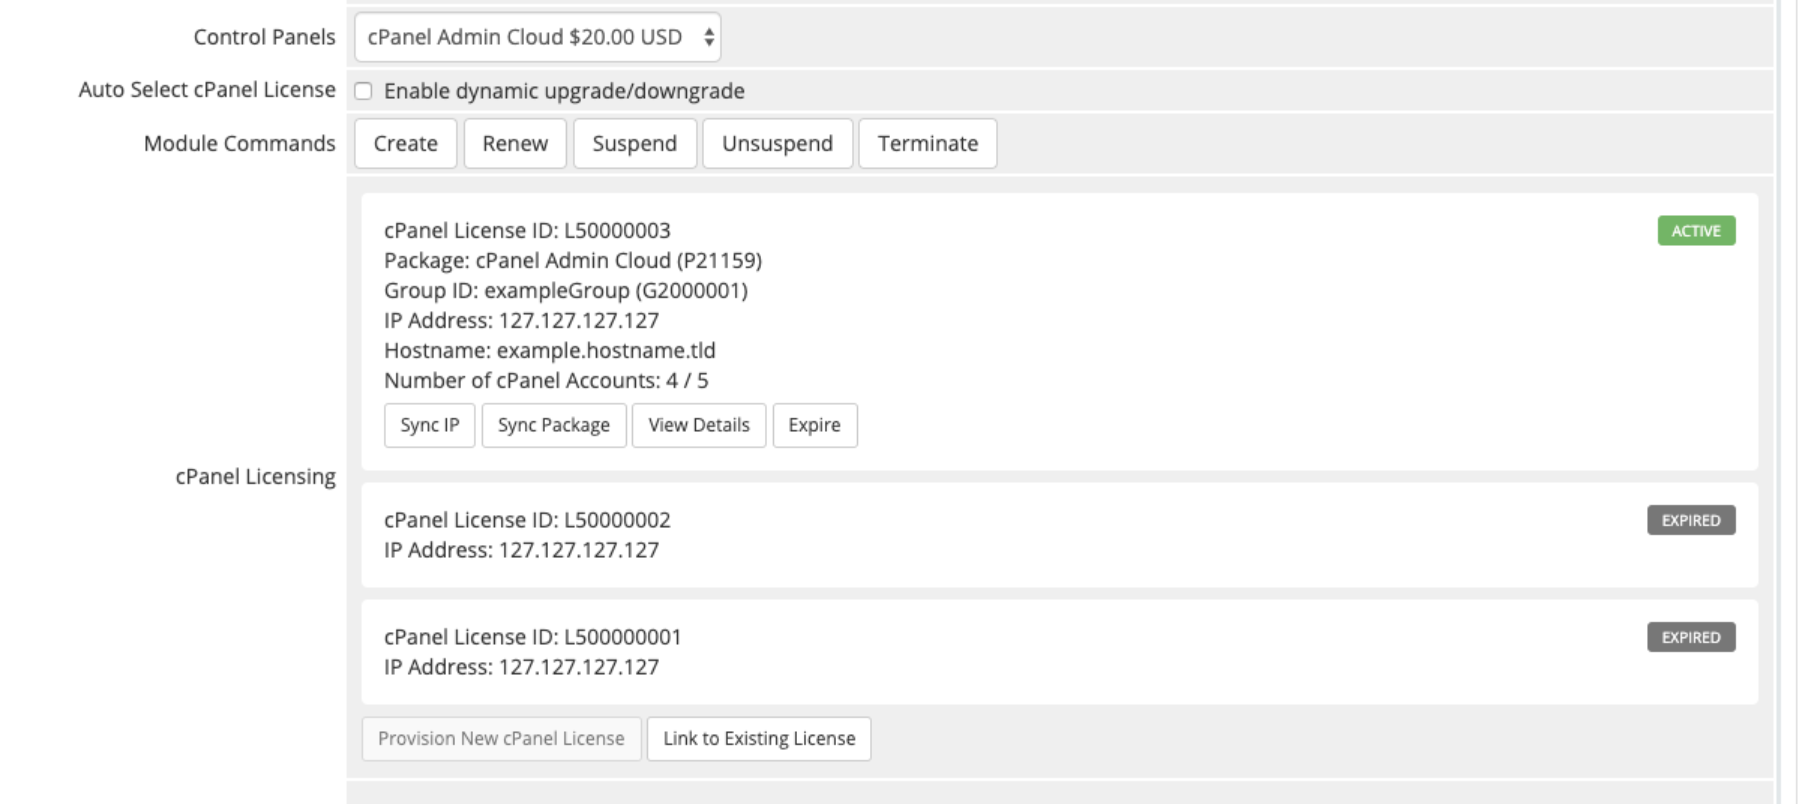
cPanel Licensing details will display for associated services in the client’s profile’s Products/Services tab.
You can also perform the following actions:
| Action | Description |
|---|---|
| Sync IP | Change the license’s IP address to use the Dedicated IP or IP Address settings. The system determines the IP address by checking for a custom field with the name IP Address. Do not attempt to change or customize the name of this custom field. |
| Sync Package | Change the license’s package to the package for the cPanel Licensing configurable option. |
| View Details | View the cPanel License information. |
| Expire | Expire the license in Manage2. Expiring the license will not stop billing for that license. To stop billing, you must also set the parent service’s configurable option to None and recalculate the Recurring Amount value. |
You can also perform the following actions for all services in the client’s profile’s Products/Services tab, regardless of whether they include cPanel licensing:
| Action | Description |
|---|---|
| Provision New cPanel License | Automatically provision a new license in Manage2. This license will use the cPanel Licensing configurable option’s displayed package and the Dedicated IP or IP Address setting. The system determines the IP address by checking for a custom field with the name IP Address. Do not attempt to change or customize the name of this custom field. |
| Link to Existing License | Search for existing licenses to assign to the service. For more information, see Assigning Licenses to Services below. |
Assigning Licenses to Services
In the cPanel Licensing module Licenses tab and in the cPanel Licensing panel for the service, you can manually associate services and licenses.
To do this:
- Search for and select the desired service (Assign License) or license (Link to Existing License).
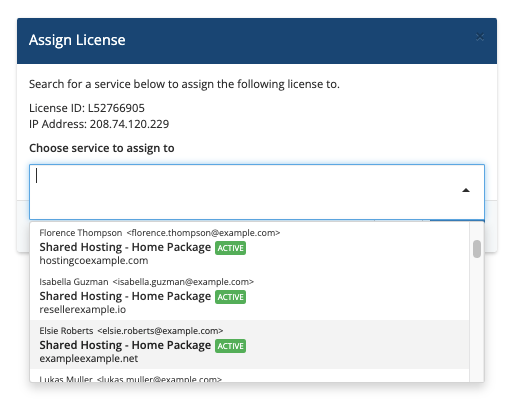
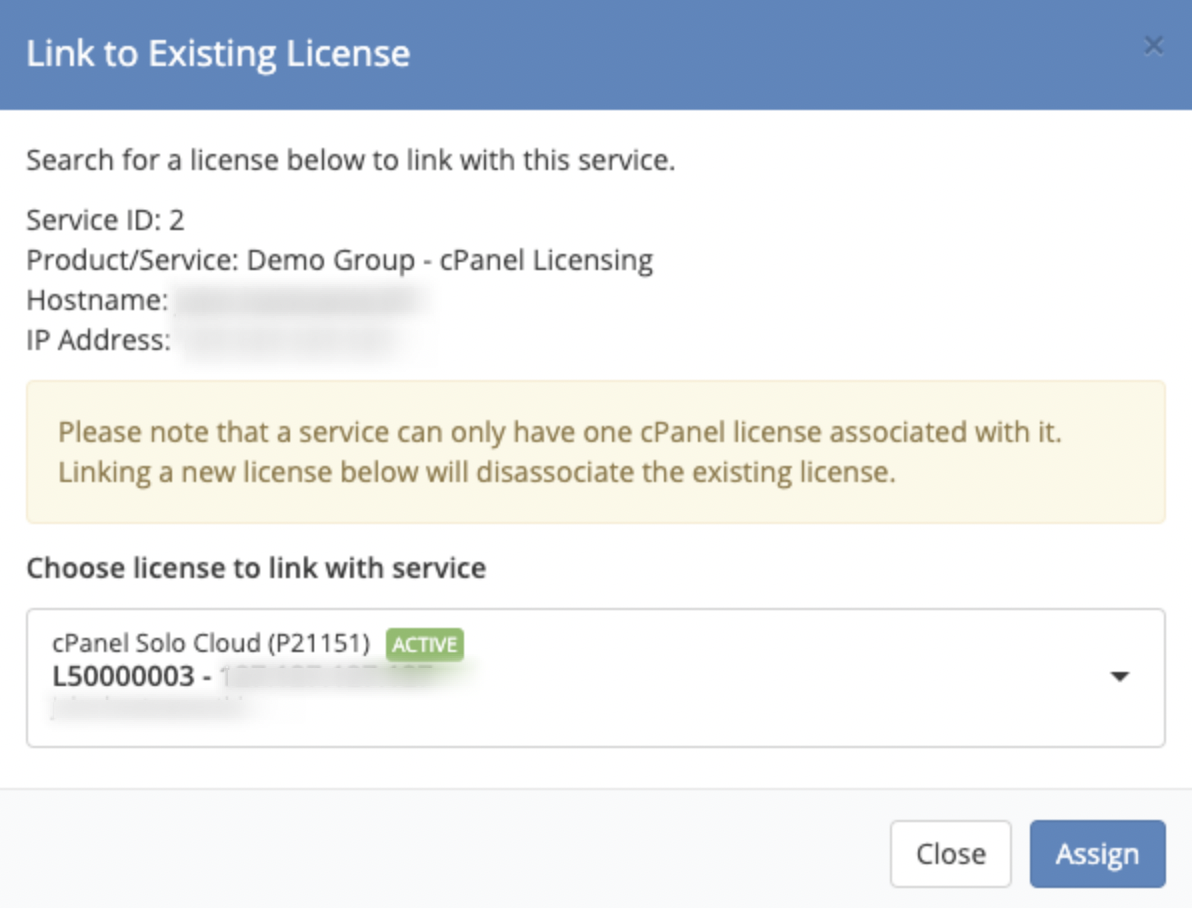
- Click Assign.
- The system will not automatically select the appropriate configurable options. You must set this for the service in the Products/Services tab using the appropriate package or using autoscaling. Otherwise, automated billing will not occur.
- You can only assign one active license to a service. If you perform the above steps for a service that already has an associated license, the new associated license replaces the existing license.
Upgrading
If you have an earlier version of the cPanel Licensing module and want to upgrade:
- Download the latest version from the WHMCS Marketplace.
- Extract the
.zipfile. - Upload the
cpanellicensingdirectory to the/modules/addonsfolder of your WHMCS installation.
Troubleshooting
You may encounter the following common issues while using this addon module:
| Error or Issue | Cause | More Information |
This license is already assigned to another service | You have already assigned the license to another service on the WHMCS installation. | cPanel License Assigned Errors |
You cannot assign a license to this service as the product to which it is assigned does not have a configurable option for a cPanel license | You attempted to assign a cPanel license to a service that does not include the required configurable options. | cPanel License Configurable Option Errors |
A license was deactivated on the same IP last month before billing could occur | The previous cPanel license for the service’s IP address accrued usage but deactivated before billing could occur. | cPanel License Deactivated Errors |
| The system is not successfully syncing license IP addresses. | You have not correctly configured the necessary custom fields in WHMCS. | cPanel License Missing IP Address |
A reactivation fee must be paid before a new license can be provisioned for that IP address. This must be done via Manage2 directly. | The license already has an associated service. | cPanel License Reactivation Errors |
cPanel Licensing options of product are not set for this service | You have not selected a pricing option for the service. | cPanel Licensing Options Errors |
Last modified: 2026 June 23