Add an Admin
Admins can log in to the Admin Area and perform actions according to their set permissions. For the best results, each member of your staff who will use or view the WHMCS Admin Area should have their own admin account.
You can create as many admins as you want and assign them as few or as many permissions as they need. Some admins may only need to view reports or a single support department, while others will perform sensitive tasks like configuring your WHMCS installation.
- For more information about admins in WHMCS, see Admins.
- For steps to reset an admin password, see Reset an Admin Password.
- For steps to edit an existing admin, see Edit an Admin.
Add an Admin
To create a new admin:
1. Create a new admin.
Go to Configuration () > System Settings > Administrator Users or Configuration () > Manage Admins.
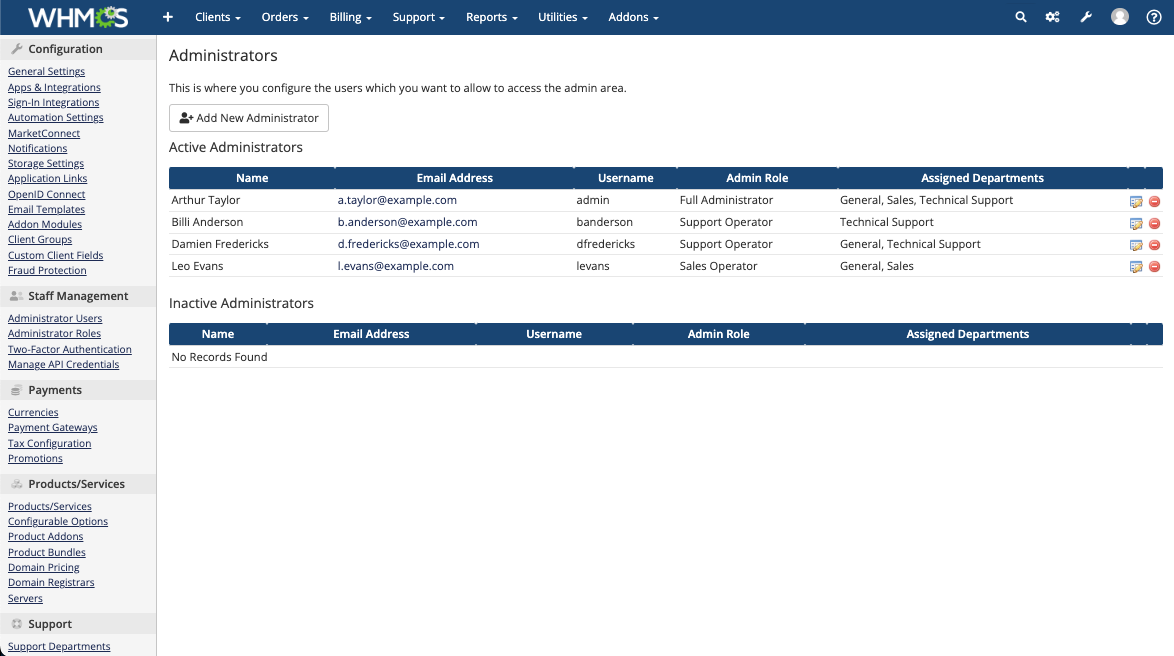
Click Add New Administrator.
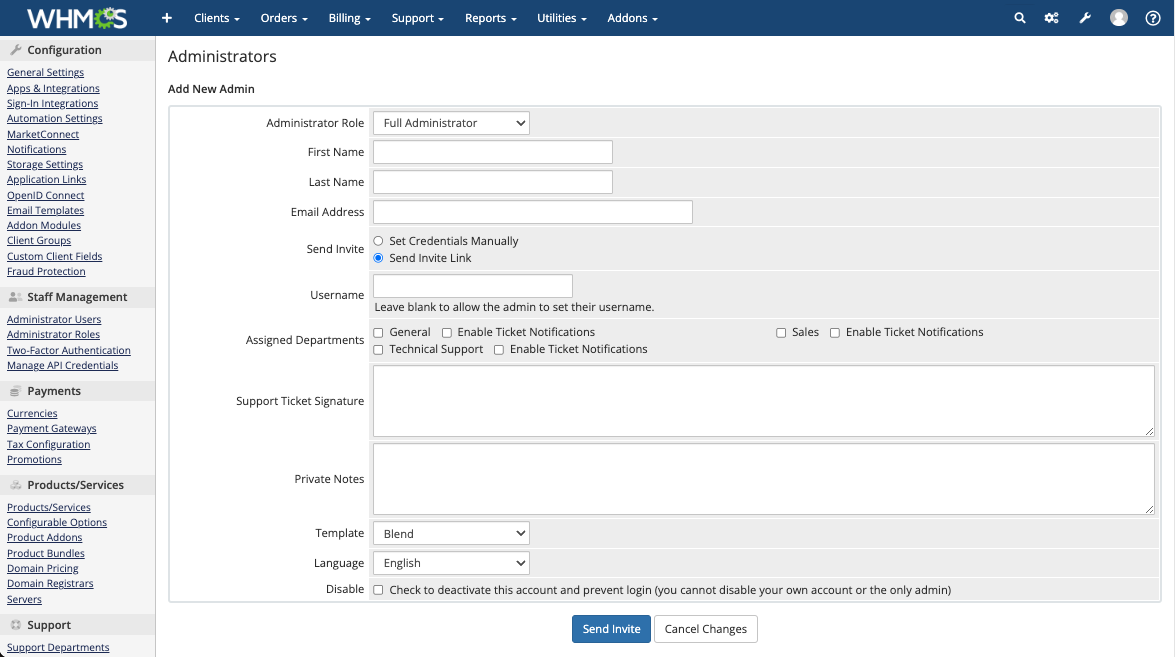
2. Choose an administrator role.
Select an administrator role.

3. Enter the admin’s basic information.
Enter the admin’s first name, last name, and email address.

4. Set the admin’s credentials or send an invite.
You can set the admin’s username and password manually or you can send an invitation.

Send an invitation.
Sending an invitation allows the admin to set their own credentials. This helps to improve admin account security.
To send an invitation, set Send Invite to Send Invite Link.
If you only want the new admin to set their own password, you can enter a username. Otherwise, the new admin will be able to select their own username and password.
- The system will send the invitation email to the email address that you specified.
- The new admin must click the invitation link to set up their username and password.For more information, see Accept an Admin Invitation.
- Invitation links expire after seven days. If a link expires before the new admin sets up their login credentials, you can resend it.For steps, see Resend an Admin Invite.
Set credentials manually.
To set the admin’s credentials manually:
- In WHMCS 8.12 and later, set Send Invite to Set Credentials Manually.
- Enter the desired username and enter and confirm a password.

- Usernames must:
- Begin with a letter (
A–Zora–z). - Contain only alphanumeric characters.
- Not include spaces or other special characters.
- Begin with a letter (
- Passwords cannot use the following characters:
&,",',<, or>.
5. Select support departments.
Select one or more support departments.

Optionally, if you want the new admin to receive notifications for the departments you selected, check Enable Ticket Notifications for the desired departments.
- The admin can only view and respond to tickets in the departments that you assign.
- If you assign the admin to a role that includes Access All Tickets Directly, they can access other departments through direct links.
6. Add a signature and notes.
Optionally, add an admin signature or notes. The notes that you enter are visible to the admin and to all other admins with the Full Administrator role.

7. Select a template and language.
Select an Admin Area template and the admin’s desired language.

8. Disable the admin.
Optionally, you can check Disable to disable the admin account and prevent future logins.

9. Save.
When you are finished, click Send Invite (if you set Send Invite to Send Invite Link) or Create Admin (if you set Send Invite to Set Credentials Manually).
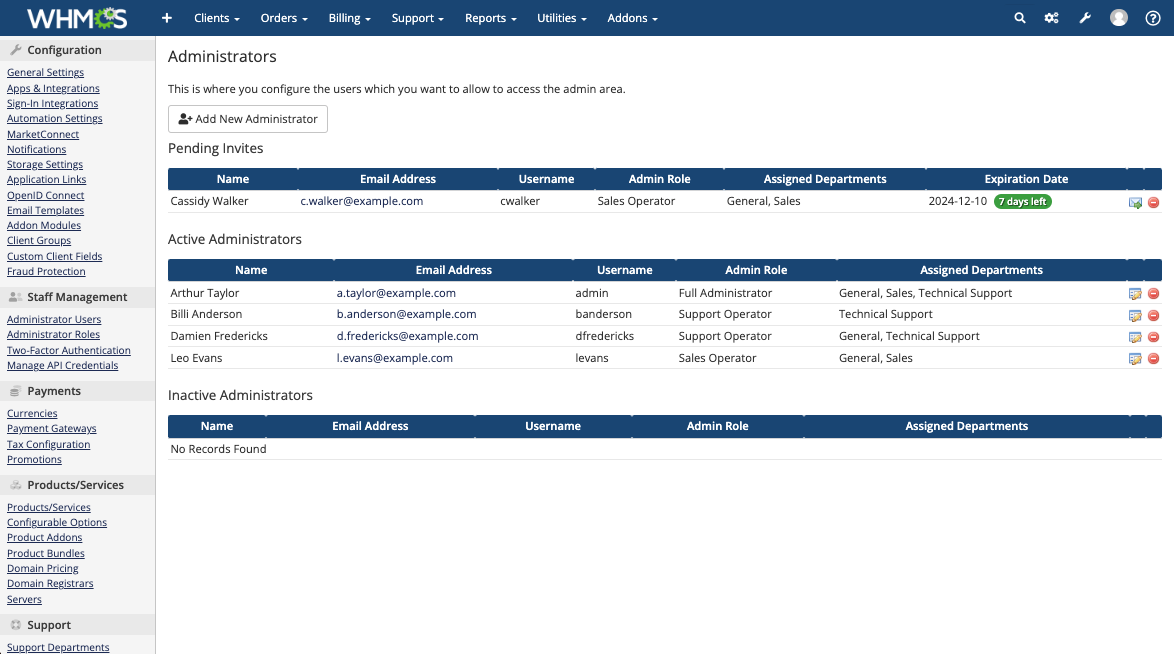
If you sent an invite, the admin will appear in the Pending Invites list until they successfully log in. You can cancel a pending invitation at any time by clicking the Delete icon.
Last modified: 2025 March 10