Add a Billable Item
You can use billable items to charge your clients for customized products or services, one-time costs, or to provide customized billing configurations.
- For more information and guidance on when to use billable items, see Billable Items and Time Billing.
- Time billing allows you to add billable items for time that your staff spends on a project. For more information, see Add Time Billing.
Create a Billable Item

To create a billable item:
1. Add a billable item.
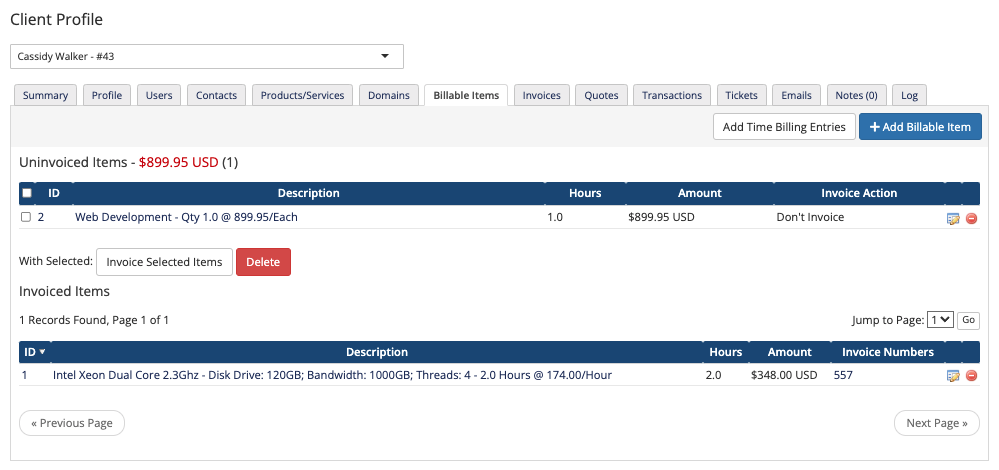
Go to the Billable Items tab in the desired client’s profile.

Click Add New.
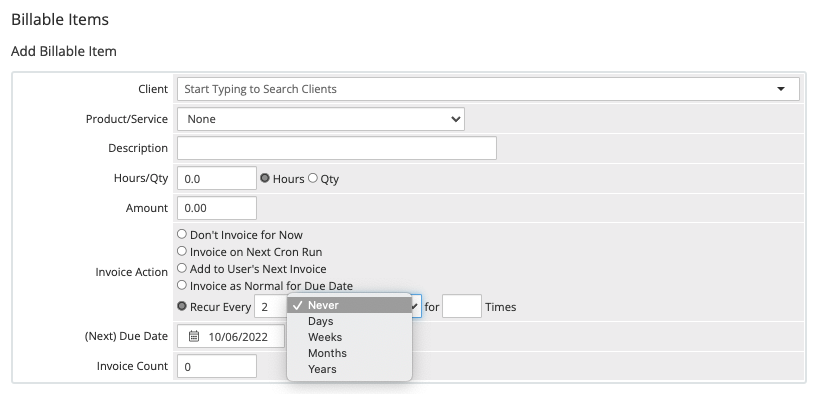
2. Enter a description.
Enter a description for the item. This description will appear on the generated invoice.
3. Enter the amount to bill.
Enter the amount to bill. The system will apply taxes normally when it generates the invoice.
4. Choose an invoice action.
Choose an invoice action:
- Don’t invoice for Now — Create the billable item for the client but do not generate an invoice yet.
- Invoice on Next Cron Run — Generate an invoice for the billable item the next time that the daily cron job runs.
- Add to User’s Next Invoice — Add the billable item to the next automated recurring invoice that the system generates for the user.
- Invoice as Normal for Next Due Date — Generate an invoice according to the date that you specify for (Next) Due Date.
- Recur — Generate recurring invoices according to the intervals you specify. If you choose this option:
- Enter a number and select whether the interval is days, weeks, months, or years.
- Enter the number of times to generate recurring invoices. Enter
0to generate invoices at the specified interval indefinitely.
5. Set a Next Due Date.
If you selected Invoice as Normal for Due Date or Recur, set a date for (Next) Due Date. The system will generate the invoice using the same rules it uses to generate other invoices.
6. Save your changes.
Click Save.
Last modified: 2025 July 28