Add and Associate Users
Users can own clients and can manage the services, billing, and other functions for multiple clients using a single login.
Adding a user to a client account sends them an invitation email unless you choose not to send one in the Admin Area.
- If you send an invitation to an existing user, they can access the client using their existing login credentials.
- If you enter an email address that does not correspond to an existing account, they can create one.
Invitations
When you associate a user with a client account, you can send an invitation to a specified email address. The invitee will receive an email and must click the included link, or you can choose to not send an invitation and add the user directly to the account.
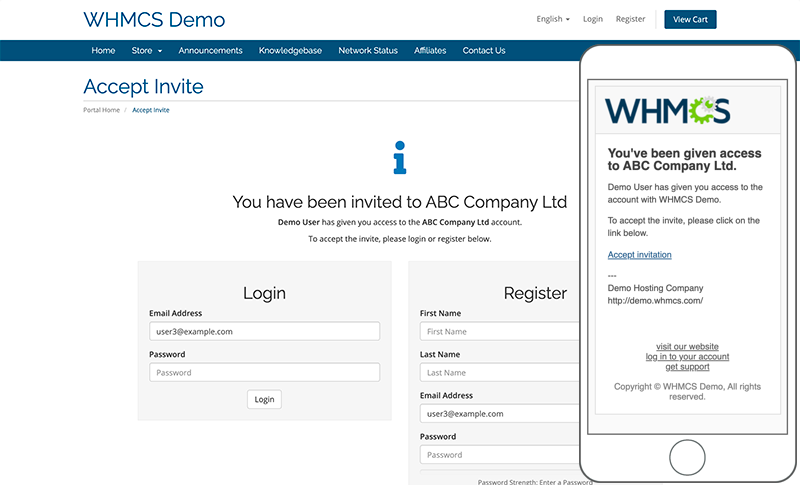
The invitation contains a one-time link that is valid for seven days. The user must click the link and complete the process to accept the invitation.
- If you send an invitation to an email address for an existing account, the recipient can log in as their existing user to accept the invitation or create a new user with any email address that they choose.Accepting an invitation is not the same as client email verification.
- If the email address does not correspond to an existing account, they can create one.
While invitations go to the specified email address, the recipient can complete the invitation process using this link with any email address they choose. Because of this, accepting an invitation is not equivalent to user email verification, which is a separate feature.
Add Users
Admins can add new users from the Admin Area, or users can add new users to client accounts in the Client Area.
Adding in the Admin Area
In the Admin Area, you can send invitations to users or create associations between clients and existing users directly.
To associate a user and client:
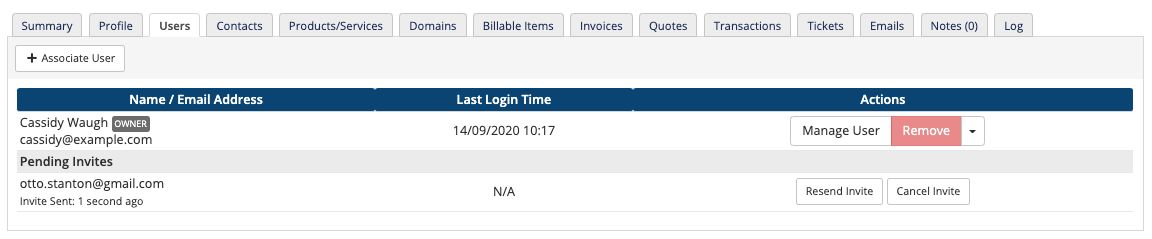
- In the Admin Area, go to the Users tab for the desired client’s profile.
- Click Associate User.
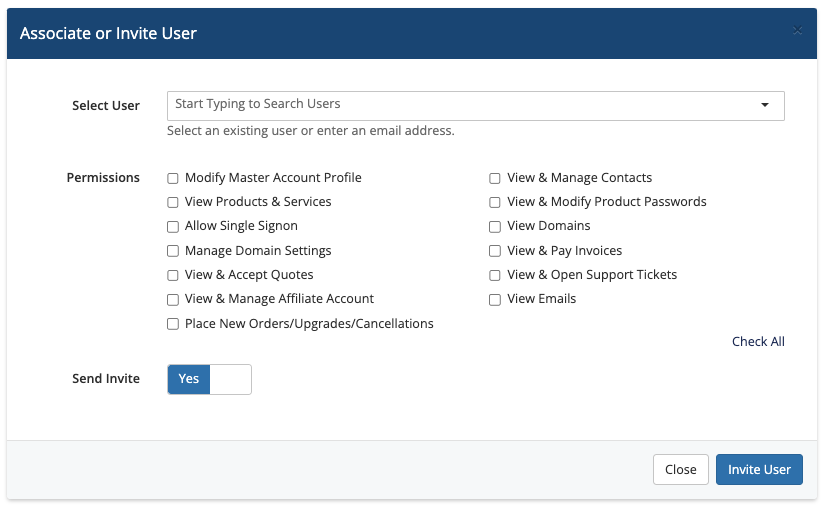
- Select a user from Select User:
- For existing users that are already registered in WHMCS, enter the user’s name or email address and select the user from the displayed list.
- For new users who have not already registered, enter the email address and select Create new user.
- Check the desired Permissions settings or select Check All to select all of the possible permissions. This sets the level of access that the user has to this client account.
- Set Send Invite to Yes to send an invitation email.If you set Send Invite to NO, the user will not receive an invitation email and they will become associated with the client account immediately.
- Click Associate User or Invite User.
The user will display in the Users tab list under Pending Invites until they accept the invitation.
Adding in the Client Area
In the Client Area, a user can add multiple new or existing clients that it can then manage.

To do this:
- In the Client Area, go to Hello, Name! > User Management.
- Enter an email address under Invite New User.
- Choose All Permissions to grant all available permissions, or choose Choose Permissions and select the desired permissions.
- Click Send Invite.
If you send an invitation to an email address for an existing account, they can access the client account using their existing login credentials. If the email address does not correspond to an existing account, they can create one.
Change the Client Account Owner
To change the user that owns a specific client account:
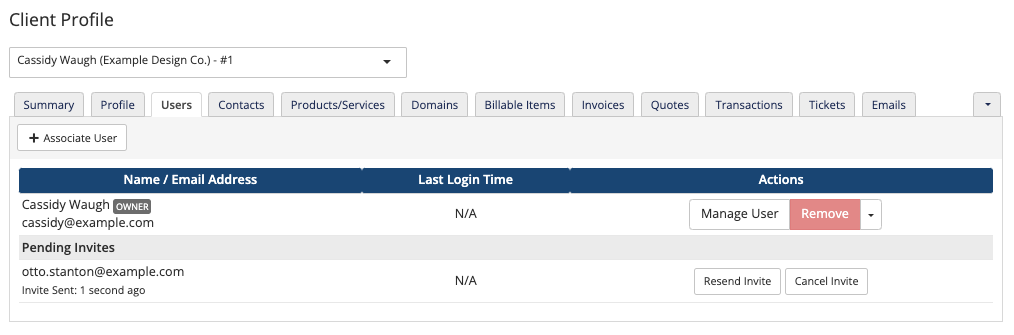
- Go to the Users tab in the client profile.
- Click Manage User for the desired user.If the desired user does not already exist, add the user and then return to this step.
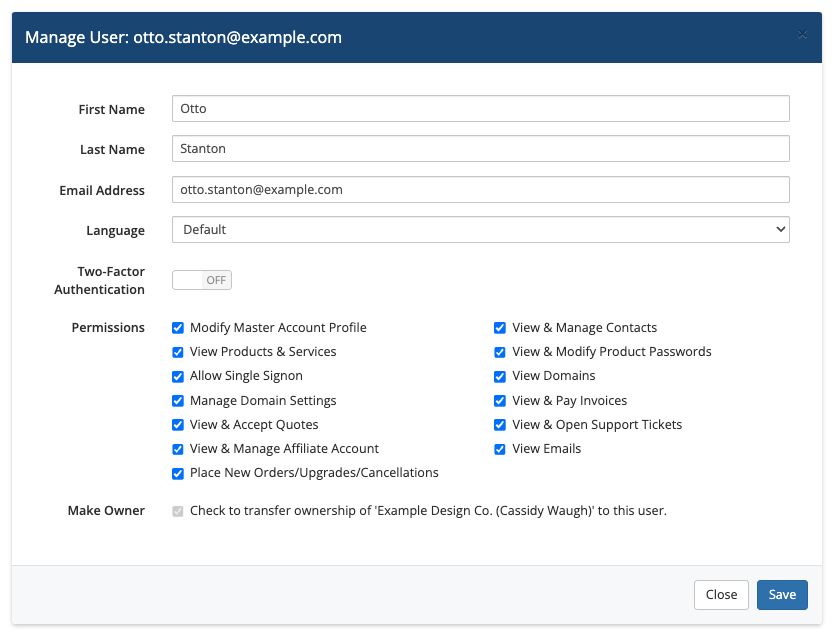
- Check Make Owner.
- Click Save.
Last modified: 2025 July 28