Create a Product
To sell something using WHMCS, you need to configure a product.
Create a Product
To create a product:
1. Create a new product.
Go to Configuration () > System Settings > Products/Services.
Click Create a New Product.
2. Choose a product type.

Choose the Product Type for your new product:
- Shared Hosting products provision shared hosting accounts using the control panel module you select.
- Reseller Hosting products provision reseller hosting accounts using the control panel module you select.
- Server/VPS products provision a VPS, dedicated, or other type of server. The client need to select a hostname, root password, and nameserver prefixes when ordering.
- Other (non-hosting) products provision any non-hosting product (for example, software licensing or design services).
You can also use MarketConnect to resell SSL certificates, SEO tools, website builders, and other products and services.
- MarketConnect automatically sets up and configures these products and populates the Client Area with merchandizing content and product recommendations.
- You can enable and configure MarketConnect products at Configuration () > System Settings > MarketConnect.
3. Configure the basic product settings.
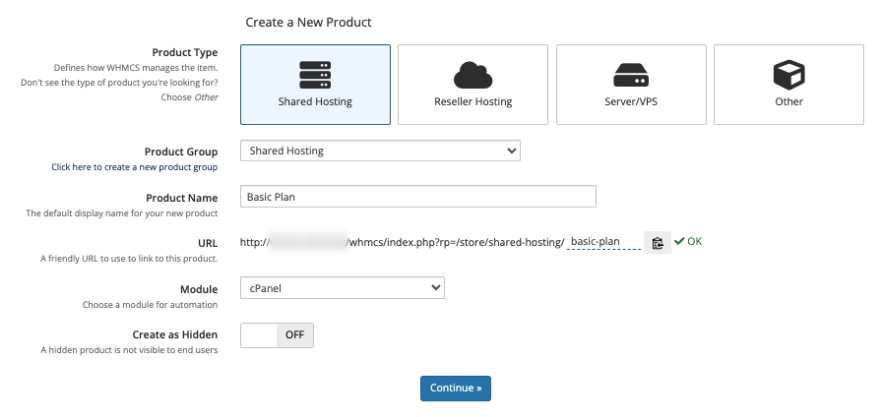
Use the displayed settings to configure the product:
- Choose the desired product group.
- Enter a name for the product.
- If you have already set up the server or know the module you want to use, select it for Module.
Some non-hosting (Other) products may not have an associated server. However, you may still wish to use a provisioning module. For example: - You could sell a website plan using the Auto Release module. - You could sell a software license using the License Software addon module.
- Click Continue. A new page will appear.
4. Configure the product details.
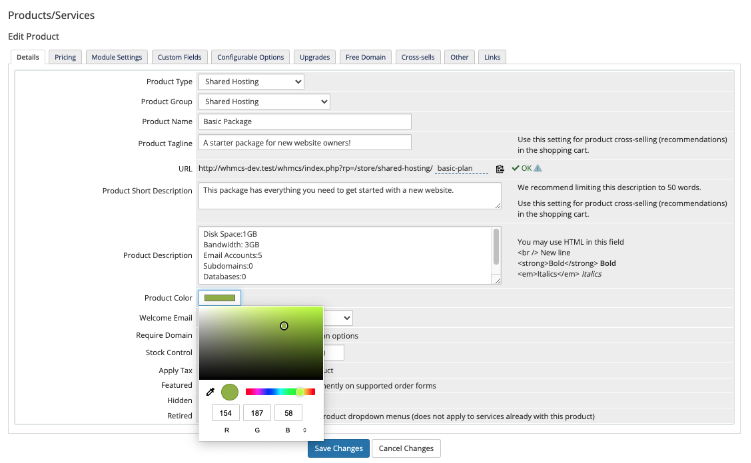
In the Details tab, configure the product description and other details:
- Set the Product Description.
- Select a Welcome Email to send when provisioning the product.WHMCS comes with several pre-made welcome email templates that you can customize at Configuration () > System Settings > Email Templates.
- For Shared Hosting, Reseller Hosting, and Server/VPS products, select Require Domain.
- Configure the other settings in the tab according to your business’s needs.
5. Configure product pricing.
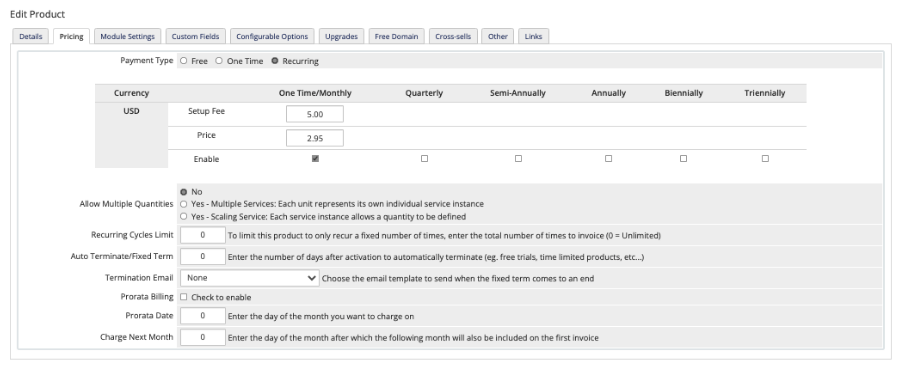
In the Pricing tab, configure pricing for the product.
- Select Recurring as the Payment Type.
- Specify the desired prices for your billing cycles. In the example above, the product is only available on a monthly basis.
- If you want to charge one, enter a Setup Fee.
You can set up as many pricing options as you wish during this step.
6. Configure your provisioning module settings.
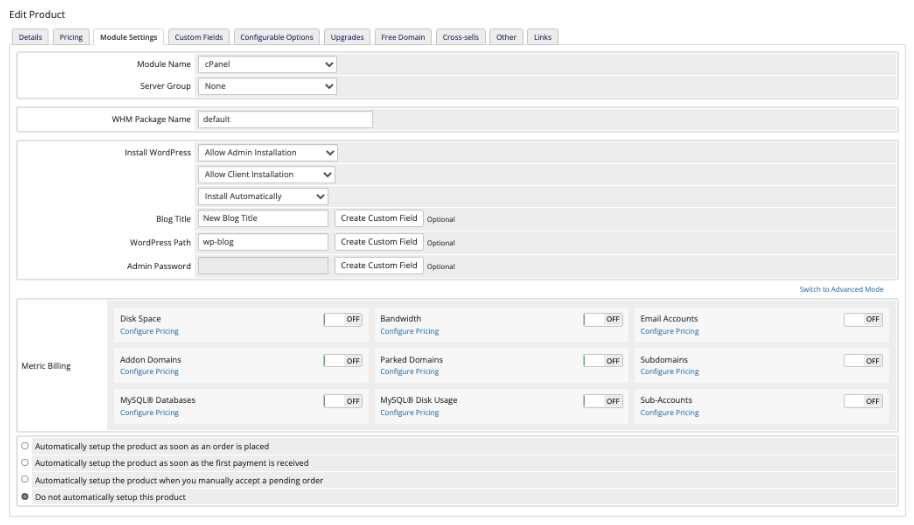
In the Module Settings tab, choose a module (if you did not already select one in Step 3 and configure it.
The settings that you configure depend on the module that you choose. For example:
- If you select cPanel, you must select a WHM package for WHM Package Name.
- If you select Auto Release, you must select Admin ID for the admin that receives the ticket and Support Dept ID for the department to send tickets to.
7. Configure other product settings.
Configure the desired settings in the other product tabs.
For example, you can offer free domains with purchase in the Free Domains tab or configure product recommendations in the Cross-sells tab.
8. Save the product.
When you are finished setting up your product, click Save Changes.
Last modified: 2026 April 30