OpenID Connect
OpenID Connect is the standard for single sign-on and identity provisioning on the internet. It uses JSON-based identity tokens (JWT) via the OAuth 2.0 protocol. In order to perform single sign-on through OpenID using WHMCS as an authentication provider, applications must use details that your WHMCS installation generates.
You can access this feature at Configuration () > System Settings > OpenID Connect.
What is the OAuth protocol?
OAuth is a protocol that allows third-party applications to obtain limited access to WHMCS on behalf of users. WHMCS uses OAuth 2, an open specification, which allows users to authenticate with WHMCS to both verify their identity and give apps permission to access their data.
After a user completes authorization, OAuth returns an access token. The access token is a string that the WHMCS installation generates. The app or service sends it with each subsequent API request to uniquely identify both the app and the authorized user.
OAuth ensures that third-party apps and services do not store or transmit the user’s WHMCS password. It also allows the user to authorize only specific permissions and to revoke access at any time. Because of this, OAuth is safer and more secure than other forms of API authorization.
OpenID Connect Workflow
Most applications and services that use OAuth or OpenID Connect require the following workflow:
- The user clicks Connect to WHMCS or a similar button or link within the app or service.
- The app or service redirects the user to the WHMCS installation.
- The user logs in to WHMCS and authorizes the app or service to access their WHMCS account using the requested permissions.
- After user approval, the system redirects them back to the app or service with an authorization code.
- The app or service uses this authorization code to make a request for a reusable access token. It will use this access token to make subsequent requests to the WHMCS API.
Credentials
All OAuth requests require a valid API Client Credential Identifier and Secret.
Generate Credentials
To generate a new set of credentials:
- Go to Utilities > System > OpenID Connect.
- Click Generate New Client API Credentials.
- Enter a name, description, URL, and any authorized redirect URIs.
- Click Generate Credentials.
When the page reloads, the Client ID and Client Secret values will display in the Client API Credentials section.
Authorized Redirect URIs
WHMCS uses the redirect URIs that you add as a canonical list of approved redirect locations for credentials. When a referring application makes a request, it must provide a redirect location. WHMCS will verify that that location is in the canonical list and will use it after the user has provided authentication and authorization.
Generate a New Client Secret
You can regenerate the client secret at any time. We recommend this if you want to rotate the secret for better security.
To reset the client secret:
- Click Manage for your credentials.
- Click Reset Client Secret.
- Click OK.
The previous secret will immediately become invalid and the page will reload, displaying the new secret.
Set Up OpenID Connect
To allow users to log in to cPanel & WHM with their WHMCS credentials:
- Set up the necessary SSL certificates on the cPanel & WHM server.OpenID Connect requires a CA-verified SSL certificate. You must install an SSL certificate on the cPanel & WHM server for all applicable ports and for the WHMCS installation itself.
- Log in to WHM as the
rootuser. - Go to WHM » Security Center » Manage External Authentications.
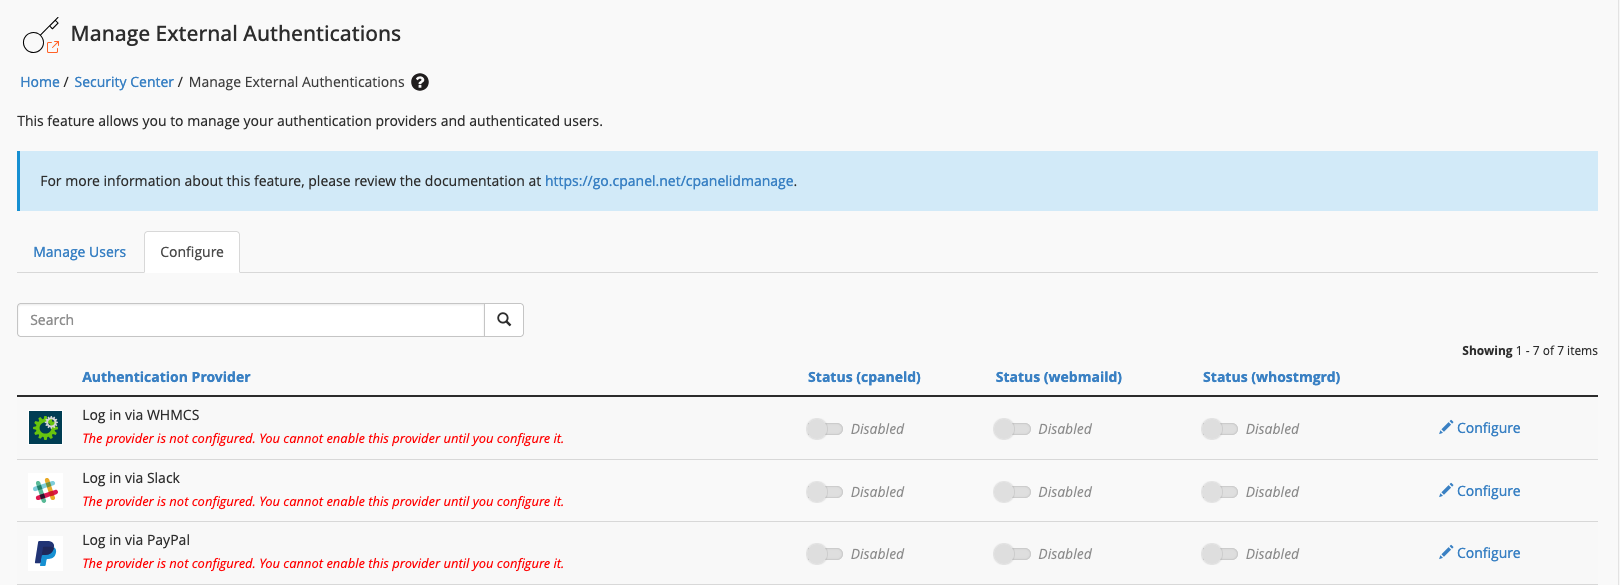
- Select the Configure tab.
- Click Configure for Log in via WHMCS.

- Copy the redirect URI that contains the cPanel port number (usually,
2083). - Log in to the WHMCS Admin Area.
- Generate credentials at Utilities > System > OpenID Connect. We recommend using the following details, making certain to use the redirect URI you retrieved from WHM:
Application Name cPanelDescription hostname.example.comLogo URI /modules/servers/cpanel/logo.png - Copy the generated client ID and client secret and paste them into the appropriate fields within WHM’s WHMCS External Authentication Provider Configuration interface.
- For Well Known Config URI, enter the URL for your OpenID configuration file (for example,
https://www.example.com/.well-known/openid-configurationorhttps://www.example.com/whmcs/oauth/openid-configuration.php).Some implementations require adding a rewrite rule to your.htaccessfile. For more information, see OpenID Connect Development. - Check to confirm that you have used the redirect URIs that WHMCS provided.
- Click Save.
- Toggle Status (cpaneld) to Enabled. The Log in via WHMCS button will immediately appear on the cPanel login page (for example,
https://host.example.com:2083):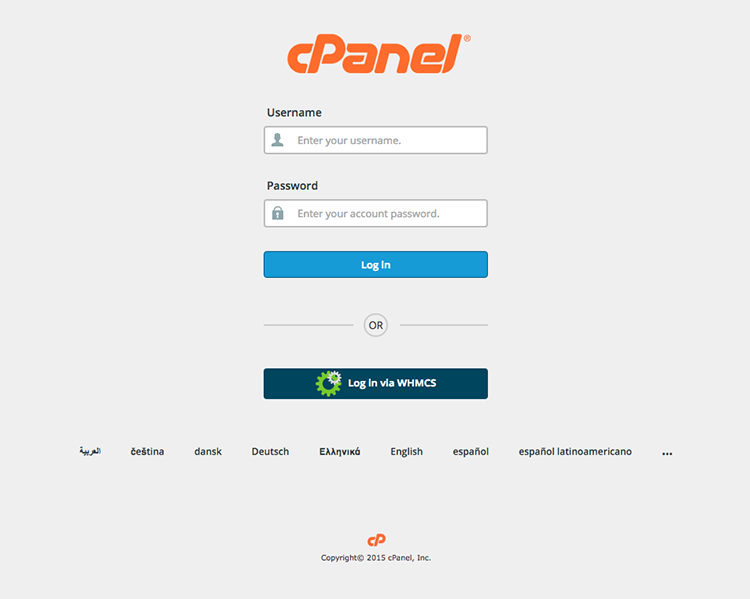 The first time that customers log in using this method, they will need to log in with their WHMCS username (email address) and password and then authenticate using their cPanel account credentials to authorize OpenID Connect.
Repeat this process for each compatible cPanel & WHM server for which you wish to offer WHMCS authentication. We recommend creating a unique set of OpenID Connect API credentials for each server that you connect with your WHMCS installation.
Multiple Hosting Accounts
cPanel does not provide a way to associate multiple cPanel accounts on the same server with a single OpenID Connect subscriber (in this case, a single WHMCS user).
If your client has multiple hosting accounts on the same cPanel & WHM server, they will only be able to pair their WHMCS credentials with one of those hosting accounts.
Last modified: 2026 April 30