Configure the System Cron Job
When you set up your WHMCS installation, you must set up the system cron to automate WHMCS’s many tasks. The system cron is a system daemon that executes tasks at designated times. WHMCS includes processes that must run on a periodic basis via the cron.
Find the Cron Command
You can find the correct command to copy-and-paste for your WHMCS installation by going to Configuration () > System Settings > Automation Settings and clicking on the first badge:

The command appears under Cron Command. Click the copy icon to copy the command to your clipboard.
Configure the Cron Command
The method that you use to configure the cron job depends on your control panel:
cPanel
To configure the cron command in cPanel:
- Log in to the cPanel account that hosts your WHMCS installation.
- Go to Home » Advanced » Cron Jobs.
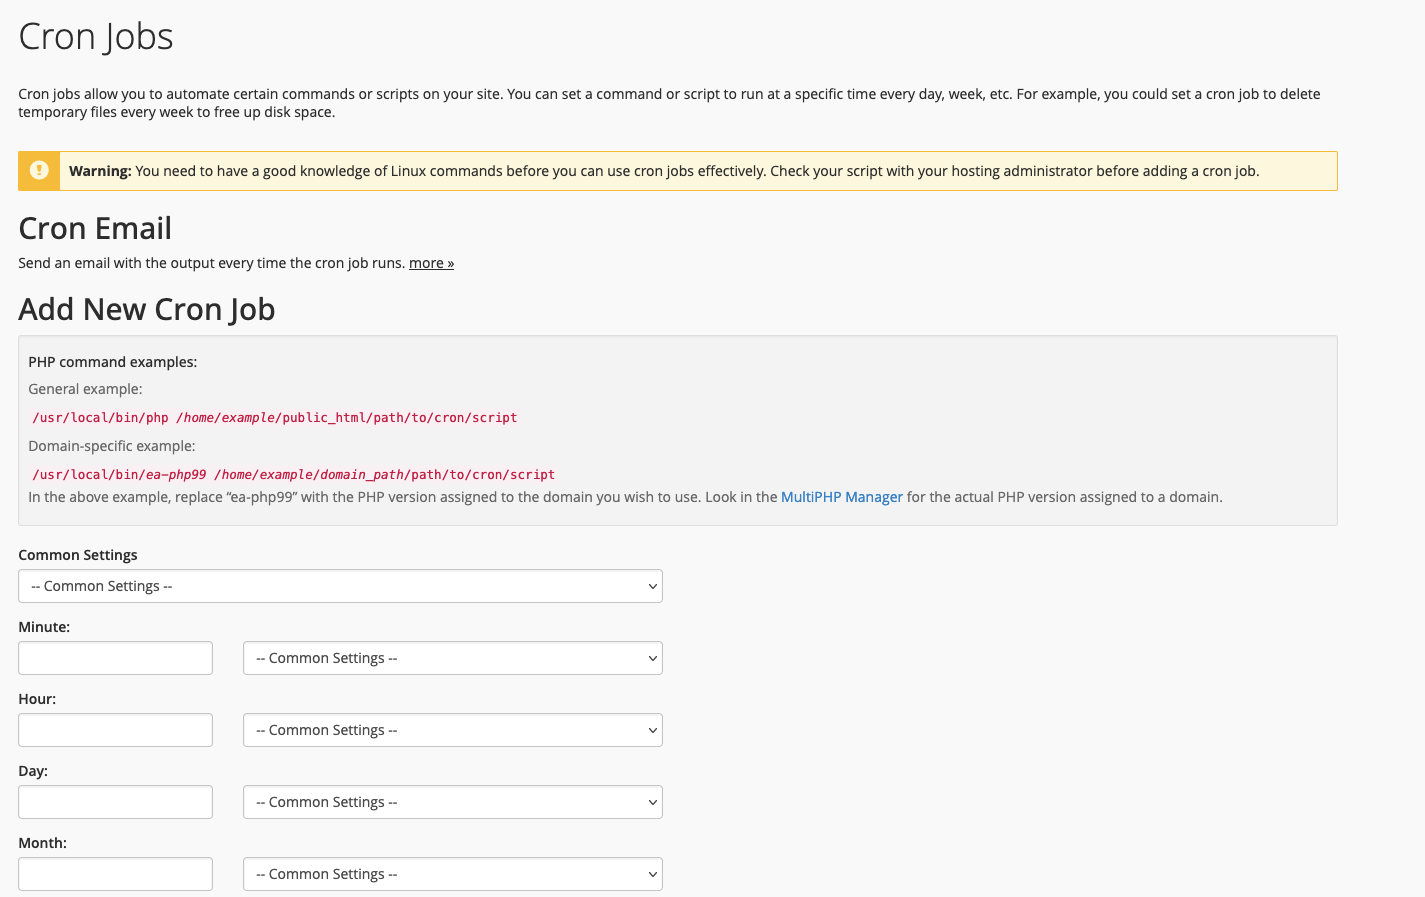
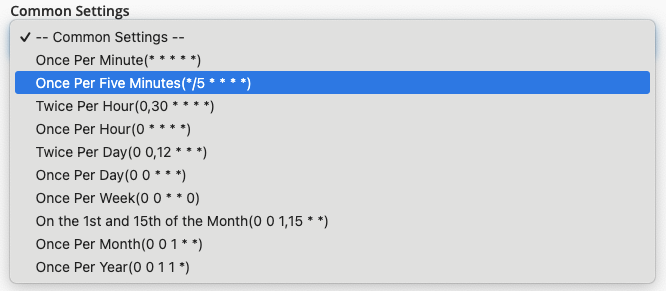
- Select Once Per Five Minutes from Common Settings.
- Paste the cron command into Command.
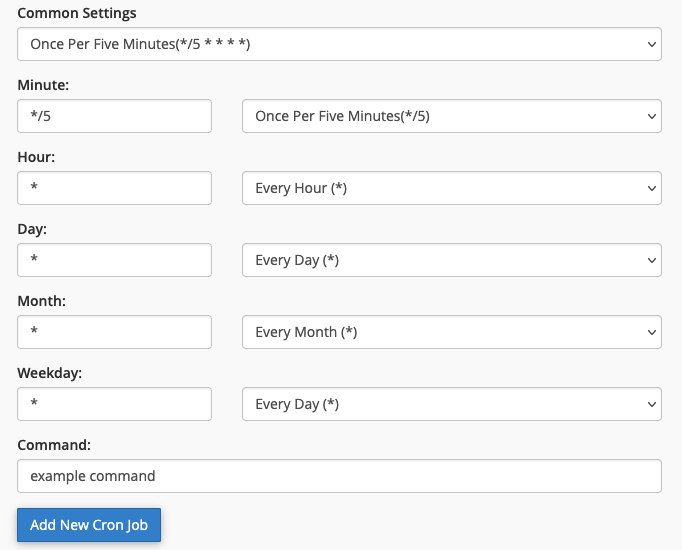
- Click Add New Cron Job.
Alternatively, click Advanced (Unix Style) and enter one of the following options:
| Minute | Hour | Day | Month | Weekday | Command |
|---|---|---|---|---|---|
*/5 | * | * | * | * | php -q /path/to/home/public_html/whmcspath/crons/cron.php |
*/5 | * | * | * | * | wget -O http://www.example.com/whmcspath/crons/cron.php >/dev/null |
*/5 | * | * | * | * | GET http://www.example.com/whmcspath/crons/cron.php |
Plesk
To configure the cron command in Plesk:
Log in to the Plesk account that hosts your WHMCS installation.
Go to Scheduled Tasks for your installation’s domain.
Click Add Task.
Enter the path to the
cron.phpscript for Script path. For example:/path/to/whmcs/crons/cron.phpSelect a compatible PHP version.
Select Cron style for Run and enter
*/5 * * * *.Click OK.
DirectAdmin
To configure the cron command in DirectAdmin:
- Log in to the DirectAdmin account that hosts your WHMCS installation.
- Go to Advanced Features » Cron Jobs.
- Click Create Cron Job.
- Enter
*/5for Minute. - Enter
*for Hour, Day of Month, Month, and Day of Week. - Paste the cron command into Command.
- Click Create.
When you configure the system cron for DirectAdmin, you must include the full path to the PHP binary in the cron command.
Depending on your server, this will be /usr/bin/php, /usr/bin/home/php, or /usr/local/bin/php. Check with your hosting provider or system administrator for the full path to the PHP binary.
For example, you could use the following commands for some server configurations:
/usr/bin/php -q /home/demo_user/domains/testdomain.com/public_html/whmcspath/crons/cron.php/usr/local/bin/php -q /home/demo_user/domains/testdomain.com/public_html/whmcspath/crons/cron.phpwget -O /dev/null http://domain.tld/path/to/cron.phpGET http://www.example.com/whmcspath/crons/cron.php
No Control Panel
If you do not use a control panel, you can configure a new crontab entry by running the following command:
crontab -e
On a new line in the file, enter the following command, replacing /path/to/home/ with the path to your WHMCS installation:
*/5 * * * * php -q /path/to/home/public_html/whmcspath/crons/cron.php
Save the changes to the file when you are finished.
Last modified: 2025 November 27