Set Up an Amazon S3 Bucket
If you want to use Amazon S3™ as the storage provider for your WHMCS installation, you will need to create an S3 bucket.
Create an S3 Bucket
To create an Amazon S3 bucket:
1. Log in to your Amazon account.
Log in to your Amazon account.
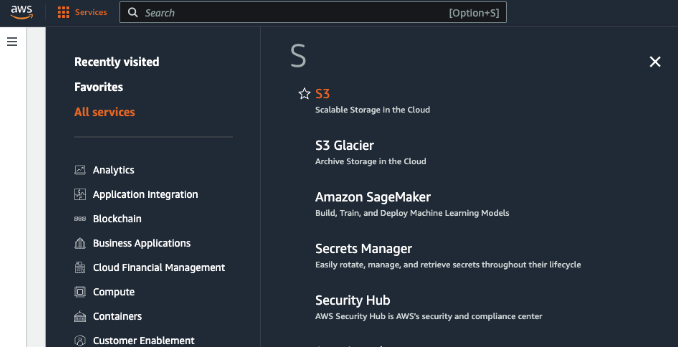
2. Create a bucket.
Go to S3.
Click Create bucket.
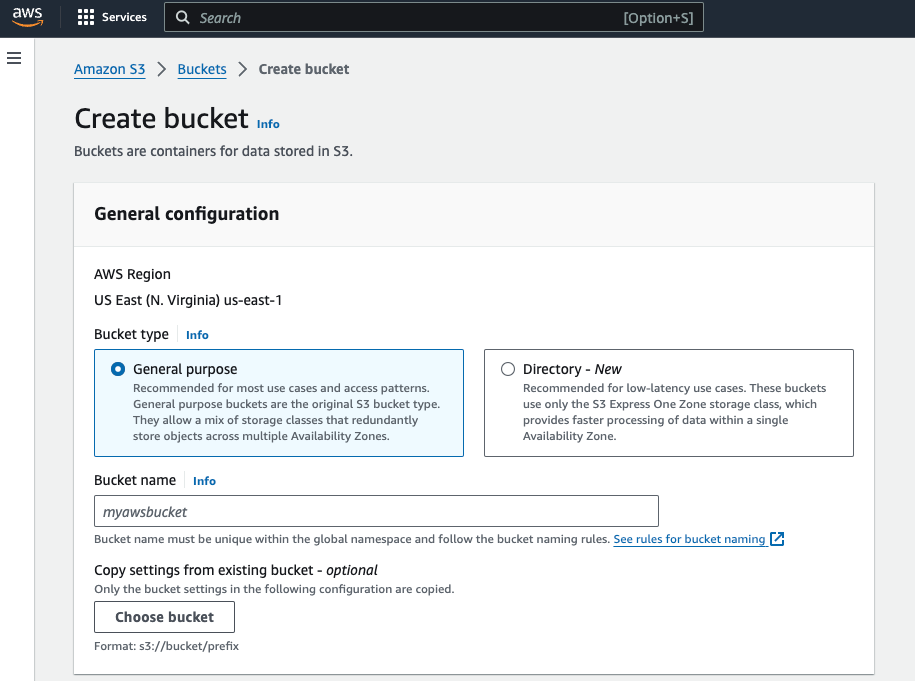
3. Configure your bucket.
To configure your bucket:
- Choose your desired region.
- Select a bucket type.
- Enter a name for your bucket.
- Configure the other bucket settings according to your needs. In most cases, for private buckets, you use the default settings.
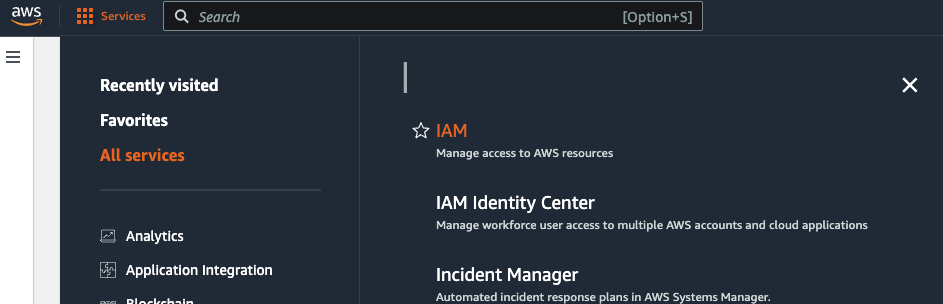
4. Create a user.
Go to IAM.
Click Users and then click Create user.
5. Configure the user.
Enter a username and click Next.
Then, select Attach existing policies directly.

6. Create a policy.
Click Create policy. The policy editor will display.
Configure the policy:
- Select S3 for Service. The available S3 permissions settings will appear.
- Under Access Level, select the following permissions:
- ListBucket under List.
- GetObject under Read.
- PutObject, ReplicateObject, and DeleteObject under Write.
- Under Resources, select Specific.
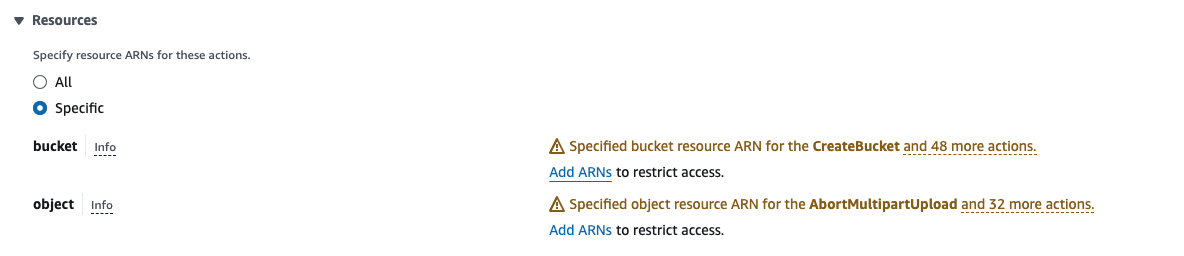
- Add an ARN:
- Click Add ARNs under bucket.
- Enter the name of the bucket that you created earlier.
- Click Add.
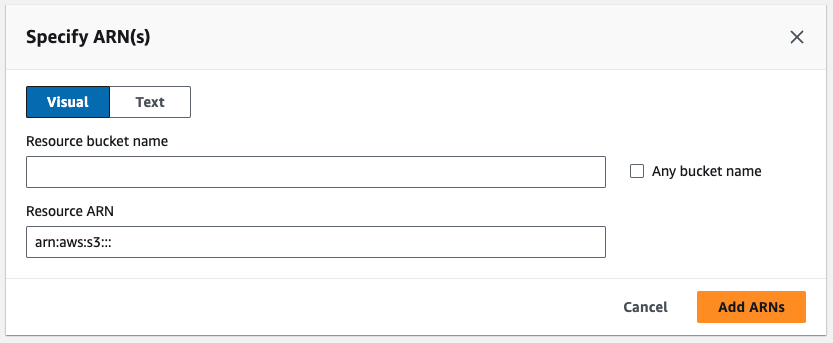
- Click Add ARN under object.
- For Resource bucket name, enter the name of the bucket that you created.
- Select Any object name.
- Click Add ARNs.
- Click Add ARNs under bucket.
- Click Next.
- Under Policy details, enter a name for the new policy and, optionally, a description to help you identify it later.
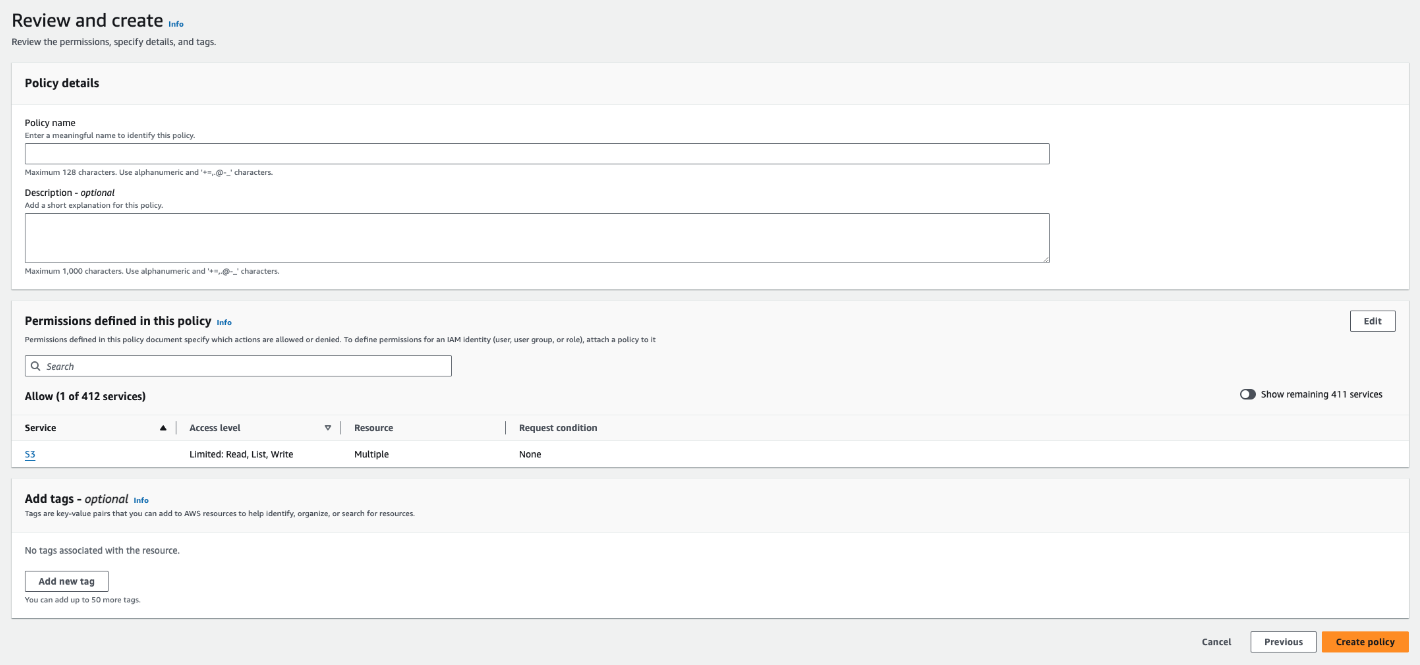
- Click Create Policy. A success message will appear.
7. Select the policy.
Return to the previous tab and refresh the list of policies.
Then, select the policy that you created and click Next.
8. Select the user.
Click Create user and select the user.
9. Create an access key.
In the Summary section:
- Click Create access key.
- Select Third-party service.
- Select the checkbox under Confirmation.
- Click Next.
- Click Create access key.
10. Store the ID and secret.
Copy and store the displayed ID and secret. You will need them in order to configure the bucket in WHMCS.
11. Click Done.
Click Done.
Last modified: 2025 July 28